Windows Azure and Cloud Computing Posts for 11/19/2012+
| A compendium of Windows Azure, Service Bus, EAI & EDI, Access Control, Connect, SQL Azure Database, and other cloud-computing articles. |

•• Updated 11/21/2012 5:00 PM PST with new articles marked ••.
• Updated 11/20/2012 5:00 PM PST with new articles marked •.
Tip: Copy bullet(s), press Ctrl+f, paste it/them to the Find textbox and click Next to locate updated articles:
![]()
Note: This post is updated daily or more frequently, depending on the availability of new articles in the following sections:
- Windows Azure Blob, Drive, Table, Queue, Hadoop and Media Services
- Windows Azure SQL Database, Federations and Reporting, Mobile Services
- Marketplace DataMarket, Cloud Numerics, Big Data and OData
- Windows Azure Service Bus, Caching, Access & Identity Control, Active Directory, and Workflow
- Windows Azure Virtual Machines, Virtual Networks, Web Sites, Connect, RDP and CDN
- Live Windows Azure Apps, APIs, Tools and Test Harnesses
- Visual Studio LightSwitch and Entity Framework v4+
- Windows Azure Infrastructure and DevOps
- Windows Azure Platform Appliance (WAPA), Hyper-V and Private/Hybrid Clouds
- Cloud Security and Governance
- Cloud Computing Events
- Other Cloud Computing Platforms and Services
Azure Blob, Drive, Table, Queue, Hadoop and Media Services
•• M Sheik Uduman Ali (@Udooz) described WAS StartCopyFromBlob operation and Transaction Compensation in a 11/21/2012 post to the Aditi Technologies blog:
The latest Windows Azure SDKs v1.7.1 and 1.8 have a nice feature called “StartCopyFromBlob” that enables us to instruct a Windows Azure data center to perform cross-storage accounts blob copy. Prior to this, we need to download chunks of blob content then upload into the destination storage account. Hence, “StartCopyFromBlob” is more efficient in terms of cost and time as well.
The notable difference in version 2012-02-12 is that copy operation is now asynchronous. It means once you made a copy request to Windows Azure Storage service, it returns a copy ID (a GUID string), copy state and HTTP status code 202 (Accepted). This means that your request is scheduled. Post to this call, when you check the copy state immediately, it is most probably in “pending” state.
StartCopyFromBlob – A TxnCompensation operation
An extra care is required while using this API, since this is one of the real world transaction compensation service operation. After making the copy request, you need to verify the actual status of the copy operation at later point in time. The later point in time would be varied from very few seconds to 2 weeks based on various constraints like source blob size, permission, connectivity, etc.
The figure below shows a typical sequence of StartCopyFromBlob operation invocation:

CloudBlockBlob and CloudPageBlob classes in Windows Azure storage SDK v1.8 provide StartCopyFromBlob() method which in turn calls the WAS REST service operation. Based on the Windows Azure Storage Team blog post, this request is placed on internal queue and it returns copy ID and copy state. The copy ID is a unique ID for the copy operation. This can be used later to verify the destination blob copy ID and also the way to abort copy operation later point in time. CopyState gives you copy operation status, number of bytes copying, etc.
Note that sequence 3 “PushCopyBlobMessage” in the above figure is my assumption about the operation.
ListBlobs – Way for Compensation
Although, copy ID is in your hand, there is no simple API that receives array of copy IDs and to return the appropriate copy states. Instead, you have to call CloudBlobContainer‘s ListBlobs() or GetXXXBlobReference() to get the copy state. If the blob is created by the copy operation, then it will have the CopyState.
CopyState might be null for blobs that are not created by copy operation
The compensation action here is to take what we need to do when a blob copy operation is neither succeeded nor in pending state. Mostly, the next call of StartCopyFromBlob() will end up with successful blob copy. Otherwise, further remedy should be taken.
It’s a pleasure to use StartCopyFromBlob(). It would be more of a pleasure, if the SDK or REST version provides simple operations like the following:
- GetCopyState(string[] copyIDs) : CopyState[]
- RetryCopyFromBlob(string failedCopyId) : void


M Sheik Uduman Ali (@Udooz) explained Authorization request signing for Windows Azure Storage REST API from PowerShell in an 11/16/2012 post:
Recently, while working on one of the Windows Azure migration engagement, we were need to have a simple and portable utility scripts that manipulate on various Windows Azure Storage (WAS) services APIs like “Get all blob metadata details from selected containers”. This is further enabled to perform various manipulations for the business.
There are various options like LINQPad queries, WAPPSCmdlets or Azure Storage Explorer + Fiddler. However, in-terms of considering the computation post to the WAS invocation, repetitiveness of the work and considering the various type of users environment, simple PowerShell script is the option. So, I have decided to write simple PowerShell script using WAS REST API. This does not require any other snap-in or WAS storage client assemblies. (Re-inventing the wheel?!)
One of the main hurdle is creating Authorization header (signing the request). It should contains the following:
- HTTP verb
- all standard HTTP headers, or empty line instead (canonicalized headers)
- the URI for the storage service (canonicalized resource)
A sample string for the signing mentioned below:
<div id="LC1">GET\n /*HTTP Verb*/</div>
<div id="LC2">\n /*Content-Encoding*/</div>
<div id="LC3">\n /*Content-Language*/</div>
<div id="LC4">\n /*Content-Length*/</div>
<div id="LC5">\n /*Content-MD5*/</div>
<div id="LC6">\n /*Content-Type*/</div>
<div id="LC7">\n /*Date*/</div>
<div id="LC8">\n /*If-Modified-Since */</div>
<div id="LC9">\n /*If-Match*/</div>
<div id="LC10">\n /*If-None-Match*/</div>
<div id="LC11">\n /*If-Unmodified-Since*/</div>
<div id="LC12">\n /*Range*/</div>
<div id="LC13">x-ms-date:Sun, 11 Oct 2009 21:49:13 GMT\nx-ms-version:2009-09-19\n /*CanonicalizedHeaders*/</div>
<div id="LC14">/udooz/photos/festival\ncomp:metadata\nrestype:container\ntimeout:20 /*CanonicalizedResource*/</div>
Read http://msdn.microsoft.com/en-us/library/windowsazure/dd179428.aspx and particularly the section http://msdn.microsoft.com/en-us/library/windowsazure/dd179428.aspx#Constructing_Element for request signing of “Authorization” header.
I have written a simple and dirty PowerShell function for blob metadata access.
function Generate-AuthString
{
param(
[string]$url
,[string]$accountName
,[string]$accountKey
,[string]$requestUtcTime
)

$uri = New-Object System.Uri -ArgumentList $url

$authString =   "GET$([char]10)$([char]10)$([char]10)$([char]10)$([char]10)$([char]10)$([char]10)$([char]10)$([char]10)$([char]10)$([char]10)$([char]10)"
$authString += "x-ms-date:" + $requestUtcTime + "$([char]10)"
$authString += "x-ms-version:2011-08-18" + "$([char]10)"
$authString += "/" + $accountName + $uri.AbsolutePath + "$([char]10)"
$authString += "comp:list$([char]10)"
$authString += "include:snapshots,uncommittedblobs,metadata$([char]10)"
$authString += "restype:container$([char]10)"
$authString += "timeout:90"

$dataToMac = [System.Text.Encoding]::UTF8.GetBytes($authString)

$accountKeyBytes = [System.Convert]::FromBase64String($accountKey)

$hmac = new-object System.Security.Cryptography.HMACSHA256((,$accountKeyBytes))
[System.Convert]::ToBase64String($hmac.ComputeHash($dataToMac))
}
Use [char] 10 for new-line, instead of “`r`n”.
Now, you need to add “Authorization” header while making the request.
[System.Net.HttpWebRequest] $request = [System.Net.WebRequest]::Create($url)

...

$request.Headers.Add("Authorization", "SharedKey " + $accountName + ":" + $authHeader);
The complete script is available at my GitHub repo https://github.com/udooz/powerplay/blob/master/README.md.
The real power when accessing REST API from PowerShell is the “XML processing”. I can simply access ListBlob() atom fields like
$xml.EnumerationResults.Blobs.Blob


Sandrino di Mattia (@sandrinodm) described DictionaryTableEntity: Working with untyped entities in the Table Storage Service in a 11/15/2012 post:
About 2 weeks ago Microsoft released the new version of the Windows Azure Storage SDK, version 2.0.0.0. This version introduces a new way to work with Table Storage which is similar to the Java implementation of the SDK. Instead of working with a DataServiceContext (which comes from WCF Data Services), you’ll work with operations. Here is an example of this new implementation:
- First we initialize the storage account, the table client and we make sure the table exists.
- We create a new customer which inherits from TableEntity
- Finally we create a TableOperation and we execute it to commit the changes.
Taking a deeper look TableEntity
You’ll see a few changes compared to the old TableServiceEntity class:
- The ETag property was added
- The Timestamp is now a DateTimeOffset (much better for working with different timezones)
- 2 new virtual methods: ReadEntity and WriteEntity

By default, these methods are implemented as follows:
- ReadEntity: Will use reflection to get a list of all properties for the current entity type. Then it will try to map the values received in the properties parameter and try to map the values.
- WriteEntity: Will use reflection to get the values of each property and add all these values to a dictionary.
As you can see, both of these methods can come in handy if you want to do something a little more advanced. Let’s see how easy it is to create a new TableEntity which acts like a dictionary.
Introducing DictionaryTableEntity
The following code overrides both the ReadEntity and WriteEntity methods. When reading the entity, instead of using reflection, the list of properties is simply stored as a Dictionary in the object. When inserting or updating the entity, it will use that Dictionary and persist the values to Table Storage. This new class also implementas the IDictionary interface and adds a few extra methods which make it easy to add new properties to the object.
Creating new entities
Ok so previously I created the Customer entity and added 2 customers. Now I want to be able to manage a bunch of information about this customer like the locations of the customer and the websites. The following implementation would even make it possible to declare the possible ‘content types’ at runtime. This means you could even extend your application without having to recompile or redeploy the application.
In this code I’m doing 2 things:
- Create a new entity to which I add the city and street properties (this represents the customer’s address)
- Create 2 new entities to which I add the url property (this represents the customer’s website)
The advantage here is that we can store all this information in a single partition (see how I’m using the customer’s name as partition key). And as a result, we can insert or update all this information in a batch transaction.
And with TableXplorer you can see the result:

Reading existing entities
Reading data with the DictionaryTableEntity is also very easy, you can access a specific property directly (as if the entity was a dictionary) or you could also iterate over all properties available in the current entity:
To get started simply grab DictionaryTableEntity.cs from GitHub and you’re good to go.


<Return to section navigation list>
Windows Azure SQL Database, Federations and Reporting, Mobile Services
• Chihan Biyikoglu (@cihangirb) posted WANT MY DB_NAMEs BACK! - How to get database names for federation members from your federations and federated databases... on 11/19/2012:
Well, I get the question on how do I get the database names for my members frequently from users. I know this is harder than it should be but hiding this information helps future proof certain operations that we are working on for future for federations so we need to continue to keep them hidden.
I realize we don't leave you many options these days for getting the database names for all your members; Today sys.databases reports just the is_federation_member property to tell you if a database is a member. The federation views in the root database like sys.federation_* does not tell you the member ids and their ranges. I know it gets complicated to generate the database names for all your members or for a given federation. So here is a quick script that will generate this the right batch for you: Run the script in the root database and it will return all the database names on all federations based on your existing distribution points.
 -- GENERATE DB_NAME SCRIPT
 USE FEDERATION ROOT WITH RESET
 GO
 SELECT CASE
 WHEN SQL_VARIANT_PROPERTY ( fmd.range_low , 'BaseType' ) IN ('int','bigint')
 THEN 'USE FEDERATION '+f.name+' (id='+cast(fmd.range_low as nvarchar)+') WITH RESET, FILTERING=OFF
 GO
 SET NOCOUNT ON
 SELECT db_name()
 GO'
 WHEN SQL_VARIANT_PROPERTY ( fmd.range_low , 'BaseType' ) IN ('varbinary')
 THEN 'USE FEDERATION '+f.name+' (id='+convert(nvarchar(max),fmd.range_low,1)+') WITH RESET, FILTERING=OFF
 GO
 SET NOCOUNT ON
 SELECT db_name()
 GO'
 WHEN SQL_VARIANT_PROPERTY ( fmd.range_low , 'BaseType' ) IN ('uniqueidentifier')
 THEN 'USE FEDERATION '+f.name+' (id='''+convert(nvarchar(max),fmd.range_low,1)+''') WITH RESET, FILTERING=OFF
 GO
 SET NOCOUNT ON
 SELECT db_name()
 GO'
 END
 FROM sys.federation_member_distributions fmd join sys.federations f on fmd.federation_id=f.federation_id
 order by fmd.range_low asc
 GO
One important note: If you repartition federation with ALTER FEDERATION .. SPLIT or DROP, rerun the script so you can get the new list of databases.
As we improve development experience, scriptability and overall manageability, these will become less of an issue but for now, the above script generation should help you work with federation member database names.


Himanshu Singh (@himanshuks) posted Windows Azure SQL Database named an Enterprise Cloud Database Leader by Forrester Research by Ann Bachrach on 11/14/2012:
Editor's Note: This post comes from Ann Bachrach, Senior Product Marketing Manager in our SQL Server team.
Forrester Research, Inc. has positioned Microsoft as a Leader in The Forrester Wave™: Enterprise Cloud Databases, Q4 2012. In the report posted here Microsoft received the highest scores of any vendor in Current Offering and Market Presence. Forrester describes its rigorous and lengthy Wave process: “To evaluate the vendors and their products against our set of criteria, we gather details of product qualifications through a combination of lab evaluations, questionnaires, demos, and/or discussions with client references.”
Forrester notes that “cloud database offerings represent a new space within the broader data management platform market, providing enterprises with an abstracted option to support agile development and new social, mobile, cloud, and eCommerce applications as well as lower IT costs.”
Within this context, Forrester identified the benefits of Windows Azure SQL Database as follows: “With this service, you can provision a SQL Server database easily, with simplified administration, high availability, scalability, and its familiar development model,” and “although there is a 150 GB limit on the individual database size with SQL Database, customers are supporting multiple terabytes by using each database as a shard and integrating it through the application.”
From the Microsoft case study site, here are a few examples of customers taking advantage of these features:
- Fujitsu System Solutions: “Developers at Fsol can also rapidly provision new databases on SQL Database, helping the company to quickly scale up or scale down its databases, just as it can for its compute needs with Windows Azure.”
- Connect2Field: “With SQL Database, the replication of data happens automatically…. For an individual company to run its own data replication is really complicated.… If we were to lose any one of our customer’s data, we would lose so much credibility that we wouldn’t be able to get any more customers. Data loss would destroy our customers’ businesses too.”
- Flavorus: “By using sharding with SQL Database, we can have tons of customers on the site at once trying to buy tickets.”
The best way to try out SQL Database and Windows Azure is through the free trial. Click here to get started.


<Return to section navigation list>
Marketplace DataMarket, Cloud Numerics, Big Data and OData
•• Wenming Ye (@wenmingye) posted Super computing 2012 and new Windows Azure HPC Hardware Announcement on 11/21/2012:

The Super Computing conference attracts some of biggest names in the industry, academia, and government institutions. This year’s attendance was down from 11,000 to about 8,000. The main floor was completely full even without some of the largest Department of Energy labs; travel restrictions and cutbacks have prevented them from setting up some of the largest booths in the past. Universities and foreign supercomputing centers helped to fill up the space. Microsoft booth sat close to the entrance of the exhibit hall which attracted good foot traffic. Don’t miss the 10 minute virtual tour with lots of exiting new hardware, etc, virtual tour ink.
Dr. Michio Kaku, the celebrity physicist and author presented the keynote on “Physics of the Future.” From Microsoft External Research group, Dr. Tony Hey delivered a session on Monday, The Fourth Paradigm - Data-Intensive Scientific Discovery. There were hundreds of sessions and tutorials, technical programs, and academic posters at the conference. This year’s Gordon Bell Prize was awarded to Tsukuba University and Tokyo Institution of Technology on “4.45 Pflops Astrophysical N-Body Simulation on K computer – The Gravitational Trillion Body Problem”. It is a typical large scale HPC problem to solve on the supercomputers.
As many of you know, Microsoft announced new Windows Azure hardware for Big Compute. As a proof of concept, the test cluster ranked #165 on the top 500 list, achieved a power efficiency of 90.2% on top of Hyper-V virtualization. More details at Bill Hilf’s blog: Windows Azure Benchmarks Show Top Performance for Big Compute.
Oakridge’s Titan with 560,640 processors, including 261,632 NVIDIA K20x accelerator cores made #1 on this year’s top 500 list with over 20 Petaflop peak performance.
After walking around the show floor and poster sessions, here are my 12 words that best describes supercomputing,
exascale, science, modeling, bigdata, parallel, performance, cloud, storage, collaboration, challenge, power, and accelerators.
I’ve added a link to photos taken at the conference with additional comments on industry news and trend:

The Exhibit Hall
This year, SC continued to focus on the Cloud and GPGPU. Both have had amazing progress in the past year. Many vendors are rushing to offer NVidia newly-announced Kepler-based GPU products. Intel now offers their 60 core Phi processor as a competition.
BigData optimized super computers are starting to appear, SDSC’s Gordon (Lustre-based), and Sherlock from Pittsburgh supercomputing center are being used for large scale graph analytics.
HDInsight: Quite a few people came by the Microsoft Booth at the BigData Station. Our customers’ reactions to HDInsight are very positive. They especially liked the fact there’s a supported distribution of Hadoop on Windows; dealing with Cygwin-based solution has been a painful experience for many of them. You can sign up for a free Hadoop cluster (HDInsight) at https://www.hadooponazure.com/ using the invitation link.
Another exciting new development is that you can get a ‘one box’ Hadoop installer for your workstation/laptop for development purposes, the installation is simple.
1. http://www.microsoft.com/web/downloads/platform.aspx Download the Microsoft Web Platform Installer.
2. Search for HDInsight, and click on “Add” to install. (my screenshot shows that I have already installed it myself)

References:
- Great posters on Data & Compute topics: http://sdrv.ms/UG75ja
- My weather demo as a service: http://weatherservice.cloudapp.net/ This demo shows how even individuals can pack complex HPC code into a service to leverage Windows Azure’s computing power.
- HDInsight: https://www.hadooponazure.com/
- SC12 Home Page: http://sc12.supercomputing.org/
- Photos taken at the Conference with detailed comments: Slide show link
- HPC Wire Magazine: www.hpcwire.com


•• Nick King of the SQL Server Team (@SQLServer) answered Oracle’s “Hekaton” challenge in an Oracle Surprised by the Present post of 11/20/2011:
I’d like to clear up some confusion from a recent Oracle-sponsored blog. It seems we hit a nerve by announcing our planned In-Memory OLTP technology, aka Project ‘Hekaton’, to be shipped as part of the next major release of SQL Server. We’ve noticed the market has also been calling out Oracle on its use of the phrase ‘In-Memory’, so it wasn’t unexpected to see a rant from Bob Evans, Oracle’s SVP of Communications, on the topic. [Editorial update: Oracle rant removed from Forbes.com on 11/20, see Bing cached page 1 and page 2]
Here on the Microsoft Server & Tools team that develops SQL Server, we’re working towards shipping products in a way that delivers maximum benefits to the customer. We don’t want to have dozens of add-ons to do something the product, in this case the database, should just do. In-Memory OLTP, aka ‘Hekaton’, is just one example of this.
It’s worth mentioning that we’ve been in the In-memory game for a couple of years now. We shipped the xVelocity Analytics Engine in SQL Server 2012 Analysis Services, and the xVelocity Columnstore index as part of SQL Server 2012. We’ve shown a 100x reduction in query processing times with this technology, and scan rates of 20 billion rows per second on industry-standard hardware, not some overpriced appliance. In 2010, we shipped the xVelocity in-memory engine as part of PowerPivot, allowing users to easily manipulate millions of rows of data in Excel on their desktops. Today, over 1.5 million customers are using Microsoft’s In-memory technology to accelerate their business. This is before ‘Hekaton’ even enters the conversation.
It was great to see Doug from Information Week also respond to Bob at Oracle, and highlight that in fact Oracle doesn’t yet ship In-Memory database technology in its Exadata appliances. Instead, Oracle requires customers to purchase yet another appliance, Exalytics, to make In-Memory happen.
We’re also realists here at Microsoft, and we know that customers want choices for their technology deployments. So we build our products that way, flexible, open to multiple deployment options, and cloud-ready. For those of you that have dealt with Oracle lately, I’m going to make my own prediction here: ask them to solve a problem for you and the solution is going to be Exadata. Am I right? And as Doug points out in his first InformationWeek article, Oracle’s approach to In-memory in Exadata is “cache-centric”, in contrast to which “Hekaton will deliver true in-memory performance”.
So I challenge Oracle, since our customers are increasingly looking to In-Memory technologies to accelerate their business. Why don’t you stop shipping TimesTen as a separate product and simply build the technology in to the next version of your flagship database? That’s what we’re going to do.
This shouldn’t be construed as a “knee-jerk” reaction to anything Oracle did. We’ve already got customers running ‘Hekaton’ today, including online gaming company Bwin, who have seen a 10x gain in performance just by enabling ‘Hekaton’ for an existing SQL Server application. As Rick Kutschera, IT Solutions Engineer at Bwin puts it, “If you know SQL Server, you know Hekaton”. This is what we mean by “built in”. Not bad for a “vaporware” project we just “invented”.
As for academic references, we’re glad to see that Oracle is reading from the Microsoft Research Database Group. But crowing triumphantly that there is “no mention of papers dealing with in-memory databases” [your emphasis] does not serve you well. Couple of suggestions for Oracle: Switch to Bing; and how about this VLDB paper as a starting point.
Ultimately, it’s customers who will choose from among the multiple competing In-memory visions on offer. And given that we as enterprise vendors tend to share our customers, we would do well to spend more time listening to what they’re saying, helping them solve their problems, and less time firing off blog posts filled with ill-informed and self-serving conclusions.
Clearly, Oracle is fighting its own fight. An Exadata in every data center is not far off from Bill’s dream of a “computer on every desk.” But, as with Bill’s vision, the world is changing. There will always be a need for a computer on a desk or a big box in a data center, but now there is so much more to enterprise technology. Cloud, mobility, virtualization, and data everywhere. The question is, how can a company called “Oracle” be surprised by the trends we see developing all around us?

What’s most interesting is Forbes Online having retracted the Oracle tirade.
![]() No significant OData articles today
No significant OData articles today
<Return to section navigation list>
Windows Azure Service Bus, Access Control Services, Caching, Active Directory and Workflow
•• Haishi Bai (@HaishiBai2010) posted Complete walkthrough: Setting up a ADFS 2.0 Server on Windows Azure IaaS and Configuring it as an Identity Provider in Windows Azure ACS on 11/20/2012:
I’ve done this several times but never got a chance to document all the steps. Since now I’ve got another opportunity to do this yet again, I’ll document all the steps necessary, starting from scratch, to configure an ADFS 2.0 server on Windows Azure IaaS, and to configure it as an Identity Provider in Windows Azure ACS.
Then we’ll use ACS to protect our web application that uses role-based security. Although I’m stripping down the steps to the bare minimum and cutting some corners , this will still be a long post, so please bear with me. Hopeful this could be your one-stop reference if you have such a task at hand. Here we go:
Create a Virtual Network
Since we are starting from scratch, we’ll start from a Virtual Network. Then, on this Virtual Network, we’ll set up our all-in-one AD forest with a single server what is both a Domain Controller (DC) and an ADFS 2.0 server. The reason we put this server on a Virtual Network is to ensure the server get a local static IP (or an ever-lasting dynamic) address.
- Log on to Windows Azure Management Portal.
- Add a new Virtual Network. In the following sample, I named my Virtual Network haishivn, with address space 192.168.0.0 – 192.168.15.255.

- Click CREATE A VIRTUAL NETWORK link to create the network.
Provision the Virtual Machine
- In Windows Azure Management Portal, select NEW->COMPUTE->VIRTUAL MACHINE->FROM GALLERY.
- Select Windows Server 2012, October 2012, and then click Next arrow.
- On next screen, enter the name of your virtual machine, enter administrator passport, pick the size you want to use, and then click Next arrow.
(Note in the following screenshot I’m using haishidc, while in later steps I’m using haishidc2 as I messed up something in the first run and had to start over. So, please consider haishidc and haishidc2 the same)- On last screen, leave availability set empty for now. Complete the wizard.
- Once the virtual machine is created, click on the name of the machine and select ENDPOINT tab.
- Click ADD ENDPOINT icon on the bottom toolbar.
- In ADD ENDPOINT dialog, click next arrow to continue.
- Add port 443 as shown in the following screenshot:

- Similarly, add port 80.
Set up The Virtual Machine
Once the virtual machine is provisioned, we are ready to set up our cozy Active Directory with one member, which will be the Domain Controller as well as the ADFS 2.0 Server.
- RDP into the virtual machine you just created. Wait patiently till Server Manager shows up.
- Go to Local Server tab, scroll down to the ROLES AND FEATURES section, then click TASKS->Add Roles and Features.

- In Add Roles and Features Wizard, click Next to continue.
- On next screen, keep Role-based or feature-based installation checked, click Next to continue.
- On Server selection screen, accept default settings and click Next.
- On Server Roles screen, check Active Directory Domain Service. This will pop up a dialog prompting to enable required features. Click Add Features to continue.
- Check Active Directory Federation Services. Again, click Add Features in the pop-up to add required features.
- Click Next all the way till the end of the wizard workflow, accepting all default settings.
- Click Install to continue. Once installation completes, click Close to close the wizard.
Configure AD and Domain controller
- Now you’ll see a warning icon reminding you some additional configurations are needed

- Click on the icon and click on the second item, which is Promote this server to a domain controller.
- In Active Directory Domain Services Configuration Wizard, select Add a new forest, enter cloudapp.net as Root domain name, and then click Next to continue. Wait, what? How come our root domain name is cloudapp.net? Actually it doesn’t matter that much – you can call it microsoft.com if you want. However, using cloudapp.net saves us a little trouble when we try to use self-issued certificates in later steps. From the perspective of outside word, the ADFS server who issues the token will be [your virtual machine name].cloudapp.net. In the following steps, we’ll use IIS to generate a self-issued cert that matches with this DNS name. The goal of this post is to get the infrastructure up and running with minimum efforts. Proper configuration and usage of various certificates deserves another post by itself.

- On next screen, provide a DSRM password. Uncheck Domain Name System (DNS) server as we don’t need this capability in our scenario (this is an all-in-one forest anyway). Click Next to continue.
- Keep clicking Next till Install button is enabled. Then click Install.
- The machine reboots and you loose your RDP connection.
(optional: grab a soda and some snacks. This will take a while)
Create Some Test Accounts
Before we move forward, let’s create a couple of user groups and a couple of test accounts.
- Launch Active Directory Users and Computers (Window + Q, then search for “users”).
- Right-click on Users node, then select New->Group:

- In New Object window, enter Manager as group name, and change Group scope to Domain local:

- Follow the same step, create a Staff group.
- Right-click on Users node, then select New->User to create a new user:

- Set up a password for the user, then finish the wizard. On a test environment, you can disallow password change and make the the password never expire to simplify password management:

- Double-click on the user name, and add the user to Manager group:

- Create another user, and add the user to Staff group.
Configure SSL Certificate
Now it’s the fun part – to configure ADFS.
- Reconnect to the Virtual Machine.
- Launch Internet Information Services Manager (Window + Q, then search for “iis”).
- Select the server node, and then double-click Server Certificates icon in the center pane.

- In the right pane, click on Create Self-Signed Certificate… link. Give a friendly name to the cert, for example haishidc2.cloudapp.net. Click OK. If you open the cert, you can see the cert is issued to [your virtual machine name].cloudapp.net. This is the reason why we used cloudapp.net domain name.
Configure ADFS Server
- Go back to Server Manager. Click on the warning icon and select Run the AD FS Management snap-in.

- Click on AD FS Federation Server Configuration Wizard link in the center pane.
- In AD FS Federation Server Configuration Wizard, leave Create a new Federation Service checked, click Next to continue.
- On next screen, keep New federation server farm checked, click Next to continue.
- On next screen, You’ll see our self-issued certificate is automatically chosen. Click Next to continue.
- On next screen, setup Administrator as the service account. Click Next.
- Click Next to complete the wizard.
Provision ACS namespace
If you haven’t done so, you can follow these steps to provision a Windows Azure ACS namespace:
- Log on to Windows Azure Management Portal.
- At upper-right corner, click on your user name, and then click Previous portal:

- This redirects to the old Silverlight portal. Click on Service Bus, Access Control & Caching in the left pane:

- Click New icon in the top tool bar to create a new ACS namespace:

- Enter a unique ACS namespace name, and click Create Namespace:

- Once the namespace is activated. Click on Access Control Service in the top tool bar to manage the ACS namespace.

- Click on Application integration link in the left pane. Then copy the URL to ws-Federation metadata. You’ll need the URL in next section.
Configure Trust Relationship with ACS – ADFS Configuration
Now it’s the fun part! Let’s configure ADFS as a trusted Identity Provider of your ACS namespace. The trust relationship is mutual, which means it needs to be configured on both ADFS side and ACS side. From ADFS side, we’ll configure ACS as a trusted relying party. And from ACS side, we’ll configure ADFS as a trusted identity provider. Let’s start with ADFS configuration.
- Back in AD FS Management snap-in, click on Required: Add a trusted relying party in the center pane.
- In Add Relying Party Trust Wizard, click Start to continue.
- Paste in the ACS ws-Federation metadata URL you got from your ACS namespace (see above steps), and click Next to continue:

- Keep clicking Next, then finally Close to complete the wizard.
- This brings up the claim rules window. Close it for now.
- Back in the main window, click on Trust Relationships->Claims Provider Trust node. You’ll see Active Directory listed in the center pane. Right-click and select Edit Claim Rules…
- In the Edit Claim Rules for Active Directory dialog, click Add Rule… button.
- Select Send Group Membership as a Claim template. Click Next.
- On next screen, set the rule name as Role claim. Pick the Manager group using the Browse… button. Pick Role as output claim type. And set claim value to be Manager. Then click Finish. What we are doing here is to generate a Role claim with value Manager for all users in the Manager group in our AD.

- Add another rule, and this time select Send LDAP Attribute as Claims template.
- Set rule name as Name claim. Pick Active Directory as attribute store, and set up the rule to map Given-Name attribute to Name claim:

- Back in the main window, click on Trust Relationships->Relying Party Trusts node. You’ll see your ACS namespace listed in the center pane. Right-click on it and select Edit Claim Rules…
- Add a new rule using Pass Through or Filter an Incoming Claim template.
- Pass through all Role claims:

- Similarly, add another pass-through rule for Name claim.
Now our ADFS server is configured to trust our ACS namespace, and it will issue a Name claim and a Role claim for authenticated users.
Configure Trust Relationship with ACS – ACS Configuration
Now let’s configure the second part of the trust relationship.
- Download your ADFS metadata from https://[your virtual machine name].cloudapp.net/FederationMetadata/2007-06/FederationMetadata.xml (hint: use Chrome or Firefox to make download easier – ignore the certificate warnings).
- In ACS management portal, click on Identity providers link in the left pane. Then click on Add link:

- On next screen, select WS-Federation identity provider, then click Next:

- On the next screen, enter a display name for the identity provider. Browse to the metadata file you’ve downloaded in step 1. Finally, set up a login link text, and click Save to finish.
Test with a web site
Now everything is up and running, let’s put them into work.
- Launch Visual Studio 2012.
- Create a new Web application using ASP.NET MVC 4 Web Application – Internet Application template.
- Open _LoginPartial.cshtml and remove the following part. We don’t have required claims (name identifier and provider) to make this part work. For simplicity let’s just remove it
@using (Html.BeginForm("LogOff", "Account", FormMethod.Post, new { id = "logoutForm" })) { @Html.AntiForgeryToken() <a href="javascript:document.getElementById('logoutForm').submit()">Log off</a> }- Right-click on the project and select Access and Identity… menu. Not seeing the menu? Probably you don’t have the awesome extension installed yet. You can download it here.
- In the Identity and Access wizard, select Use the Windows Azure Access Control Service option. If you haven’t used the wizard before, you’ll need to enter your ACS namespace name and management key. You can also click on the (Change…) link to switch to a different namespace if needed:

- Where to get the ACS namespace management key, you ask? In ACS namespace management portal, click on the Management service link in the left pane, then click on ManagementClient link in the center pane:

- On next screen, click on Symmetric Key link, and finally in the next screen, copy the Key field.
- Where were we… right, the Identity and Access wizard. Once you’ve entered your ACS information correctly, you’ll see the list of trusted identity providers populated. Select identity provider(s) you want to use. In this case we’ll select the single ADFS provider:

- Click OK to complete the wizard – that was easy, wasn’t it?
- Now launch the application by pressing F5.
- You’ll see a certificate warning – that’s a good sign! This means the redirection to ADFS is working and the browser is complaining about our self-issued cert. Click Continue to this website to continue.
- You’ll be asked to log on to your domain. Type in your credential to log in (make sure you are using the right domain name). You can also use [user]@[domain] format, for example joe@cloudapp.net:

- And it works just as designed:
Role-based security
That was exciting, wasn’t it? Now let’s have more fun. In this part we’ll restrict access to the About() method of home controller to Manager role only.
- Open HomeController.cs and decorate the About() method:
[Authorize(Roles="Manager")] public ActionResult About() { ViewBag.Message = "Your app description page."; return View(); }- Launch the app, log in as joe, who’s a Manager. Click on About link. Everything is good.
- Now restart the app, log in as a Staff user – access denied! A-xcellent.
Summary
There you go! An Active Directory, a Domain Controller, an ADFS server, all on Windows Azure IaaS. And the ADFS server is configured as a trusted identity provider to our ACS namespace, which in turn provides claim-based authentication to our web application who uses role-based security! That’s really fun!
Bonus Item
Still reading? Thank you! Now you deserve a little bonus. Remember the log on dialog in above test? That’s not very nice looking. Follow this link to learn a little trick to bring up a login form instead.


I’ve been waiting for a detailed tutorial on this topic. Thanks, Haishi.

Vittorio Bertocci (@vibronet) posted Introducing the Developer Preview of the JSON Web Token Handler for the Microsoft .NET Framework 4.5 on 11/20/2012:
The JWT handler class diagram, spanning 3 monitors :-)
Today I am really, really happy to announce the developer preview of a new extension that will make the JSON Web Token format (JWT) a first-class citizen in the .NET Framework: the JSON Web Token Handler for the Microsoft .NET Framework 4.5 (JWT handler from now on in this post :-)).
What is the JSON Web Token (JWT) Format Anyway?
“JSON Web Token (JWT) is a compact token format intended for space constrained environments such as HTTP Authorization headers and URI query parameters. JWTs encode claims to be transmitted as a JavaScript Object Notation (JSON) object […]”. That quote is taken straight from the IETF’s (OAuth Working Group) Internet Draft that specifies the format.
That’s a remarkably straightforward definition, which hints at the good properties of the JWT format which make it especially useful in REST based solutions. JWT is very popular. Just search the web for “JWT token” followed by your programming language of choice, and chances are you’ll find an implementation; Oracle uses it in its Fusion Middleware; Google uses it in its App Engine Security Module; Salesforce uses it for handling application access; and closer to home, JWT is the token format used by Windows Azure Active Directory for issuing claims for all of its workloads entailing REST exchanges, such as issuing tokens for querying the Graph API; ACS namespaces can issue JWTs as well, even for Web SSO. If that would not be enough, consider that JWT is the token format used in OpenID Connect. Convinced of the importance of JWT yet? :-)
The JWT Handler
If you want to protect your resources using Windows Azure Active Directory and a lightweight token format, you’ll want your applications to be able to work with JWTs. That will be the appropriate choice especially when more demanding options are not viable: for example, securing a REST service with a SAML token is very likely to put your system under strain, whereas a JWT is the perfect choice for it. And if you are building your applications on .NET 4.5, that’s where the JWT handler comes in.
Given that I am giving the formal definition, let me use the full name of the product for the occasion:
The JSON Web Token Handler for the Microsoft .NET Framework 4.5 is a .NET 4.5 assembly, distributed via a NuGet package, providing a collection of classes you can use for deserializing, validating, manipulating, generating, issuing and serializing JWTs.
The .NET Framework 4.5 already has the concept of security token, in the form of the WIF classes providing abstract types (SecurityToken, SecurityTokenHandler) and out of the box support for concrete formats: SAML1.1, SAML 2.0, X.509, and the like. The JWT handler builds on that framework, providing the necessary classes to allow you to work with JWTs like if they were just as another token format among the ones provided directly in .NET 4.5.
As such, you’ll find in the package classes like JWTSecurityTokenHandler, JWTSecurityToken, JWTIssuerNameRegistry, JWTIssuerTokenResolver and all the classes which are necessary for the WIF machinery to work with the new token type. You would not normally deal with those directly, you’d just configure your app to use WIF (say for Web SSO) and add the JWTSecurityTokenHandler to the handlers collection; the WIF pipeline would call those classes at the right time for you.Although integration with the existing WIF pipeline is good, we wanted to make sure that you’d have a great developer experience in handling JWTs even when your application is not configured to use WIF. After all, the .NET framework does not offer anything out of the box for enforcing access control for REST services hence (for now ;-)) you’d have to code the request authentication logic yourself, and asking you to set up the WIF config environment on top of that would make things more difficult for you. To that purpose, we made two key design decisions:
We created an explicit representation of the validation coordinates that should be used to establish if a JWT is valid, and codified it in a public class (TokenValidationParameters). We added the necessary logic for populating this class from the usual WIF web.config settings.
Along with the usual methods you’d find in a normal implementation of SecurityTokenHandler, which operate with the data retrieved from the WIF configuration, we added an overload of ValidateToken that accept the bits of the token and a TokenValidationParameters instance; that allows you to take advantage of the handler’s validation logic without adding any config overhead.
This is just an introduction, which will be followed by deep dives and documentation: hence I won’t go too deep into the details; however I just want to stress that we really tried our best to make things as easy as we could to program against. For example: although in the generic case you should be able to validate issuer and audience from lists of multiple values, we provided both collection and scalar versions of the corresponding properties in TokenValidationParameters so that the code in the single values case is as simple as possible. Your feedback will be super important to validate those choices or critique them!
After this super-quick introduction, let’s get a bit more practical with a couple of concrete examples.
Using the JWT Handler with REST Services
Today we also released a refresh of the developer preview of our Windows Azure Authentication Library (AAL). As part of that refresh, we updated all the associated samples to use the JWT hander to validate tokens on the resource side: hence, those samples are meant to demonstrate both AAL and the JWT handler.
To give you a taste of the “WIF-less” use of the JWT token, I’ll walk you through a short snippet from one of the AAL samples.
The ShipperServiceWebAPI project is a simple Web API based service. If you go to the global.asax, you’ll find that we added a DelegatingHandler for extracting the token from incoming requests secured via OAuth2 bearer tokens, which in our specific case (tokens obtained from Windows Azure AD via AAL) happen to be JWTs. Below you can find the relevant code using the JWT handler:
1: JWTSecurityTokenHandler tokenHandler =new JWTSecurityTokenHandler();2: // Set the expected properties of the JWT token in the TokenValidationParameters3: TokenValidationParameters validationParameters =new TokenValidationParameters()4: {5: AllowedAudience = ConfigurationManager.AppSettings["AllowedAudience"],6: ValidIssuer = ConfigurationManager.AppSettings["Issuer"],8: // Fetch the signing token from the FederationMetadata document of the tenant.9: SigningToken = new X509SecurityToken(new X509Certificate2(GetSigningCertificate(ConfigurationManager.AppSettings["FedMetadataEndpoint"])))10: };11:12: Thread.CurrentPrincipal = tokenHandler.ValidateToken(token,validationParameters);1: create a new JWTSecurityTokenHandler
3: create a new instance of TokenValidationParameters, passing in
5: the expected audience for the service (in our case, urn:shipperservice:interactiveauthentication)
6: the expected issuer of the token (in our case, an ACS namespace: https://humongousinsurance.accesscontrol.windows.net/)
9: the key we use for validating the issuer’s signature. Here we are using a simple utility function for reaching out to ACS’ metadata to get the certificate on the fly, but you could also have it installed in the store, saved it in the file system, or whatever other mechanism comes to mind. Also, of course you could have used a simple symmetric key if the issuer is configured to sign with it.
12: call ValidateToken on tokenHandler, passing in the JWT bits and the validation coordinates. If successfully validated, a ClaimsPrincipal instance will be populated with the claims received in the token and assigned in the current principal.
That’s all there is to it! Very straightforward, right? If you’d compare it with the initialization required by “traditional” WIF token handlers, I am sure you’d be pleasantly surprised :-)
Using the JWT Handler With WIF Applications
Great, you can use the JWT handler outside of WIF; but what about using with your existing WIF applications? Well, that’s quite straightforward.
Let’s say you have an MVC4 application configured to handle Web Sign On using ACS; any application will do. For example: remember the blog post I published a couple of weeks ago, the one about creating an ACS namespace which trusts both a Windows Azure Active Directory tenant and Facebook? I will refer to that (although, it’s worth stressing it, ANY web app trusting ACS via WIF will do).
Head to the ACS management portal, select your RP and scroll down to the token format section. By default, SAML is selected; hit the dropdown and select JWT instead.

Great! Now open your solution in Visual Studio, and add a package reference to the JSON Web Token Handler for the Microsoft .NET Framework 4.5 NuGet.
That said, open your config file and locate the system.identityModel section:
1:<system.identityModel>2: <identityConfiguration>3: <audienceUris>4: <add value="http://localhost:61211/" />5: </audienceUris>6: <securityTokenHandlers>7: <add type="Microsoft.IdentityModel.Tokens.JWT.JWTSecurityTokenHandler,Microsoft.IdentityModel.Tokens.JWT" />8: <securityTokenHandlerConfiguration>9: <certificateValidation certificateValidationMode="PeerTrust"/>10: </securityTokenHandlerConfiguration>11: </securityTokenHandlers>Right under </audienceURIs,> paste the lines from 6 to 11. Those lines tell to WIF that there is a class for handling JWT tokens; furthermore, it specifies what signing certificates should be considered valid. Now, that requires a little digression. WIF has another config element, the IssuerNameRegistry, which specifies the thumbprints of the certificates that are associated with trusted issuers. The good news is that the JWT handler will automatically pick up the IssuerNameRegistry settings.
Issuers in the Microsoft world (ACS, ADFS, custom STSes based on WIF) will typically send together with the SAML token itself the bits of the certificate whose corresponding private key was used for signing. That means that you do not really need to install the certificate bits in order to verify the signature of incoming tokens, as you’ll receive the cert bits just in time. And given that the cert bits must correspond to the thumbprint specified by IssuerNameRegistry anyway, you can turn off cert validation (which would verify whether the cert is installed in the trusted people store, that it has been emitted by a trusted CA, or both) without being too worried about spoofing.
Now, JWT is ALL about being nimble: as such, it would be pretty surprising if it too would carry an entire X.509 certificate at every roundtrip; right? The implication for us is that in order to validate the signature of the incoming JWT, we must install the signature verification certificate in the trusted people store.
How do you do that? Well, there are many different tricks you can use. The simplest: open the metadata document (example: https://lefederateur.accesscontrol.windows.net/FederationMetadata/2007-06/FederationMetadata.xml), copy the text of the X509Certificate element from the RoleDescriptor/KeyDescriptor/KeyInfo/X509Data path and save it in a text file with extension .CER. Double-click on the file, hit the “Install Certificate…” button, choose Local Machine, Trusted People, and you’re in business. Yes, I too wish it would be less complicated; I wrote a little utility for automating this, I’ll see if we can find a way to publish it.
Anyway, at this point we are done! Hit F5, and you’ll experience Web SSO backed by a JWT instead of a SAML token. The only visible difference at this point is that your Name property will likely look a bit odd: right now we are assigning the nameidentifier claim to it, which is not what we want to do moving forward, but we wanted to make sure that there is a value in that property for you as you experiment with the handler.
How Will You Use It?
Well, there you have it. JWT is a very important format, and Windows Azure Active Directory uses it across the board. With the developer preview of the JWT handler, you now have a way to process JWTs in your applications. We’ll talk more about the JWT handler and suggest more ways you can take advantage of the handler. Above all, we are very interested to hear from you how you want to use the handler in your own solutions: the time to speak up is now, as during the dev preview we still have time to adjust the aim. Looking forward for your feedback!


Vittorio Bertocci (@vibronet) reported a A Refresh of the Windows Azure Authentication Library Developer Preview on 11/20/2012:
Three months ago we released the first developer preview of the Windows Azure Authentication Library. Today we are publishing a refresh of the developer preview, with some important (and at times radical) improvements.
We already kind of released this update, albeit in stealth mode, to enable the Windows Azure authentication bits in the ASP.NET Fall 2012 Update which is the result of a collaboration between our team and ASP.NET; we also used the new AAL in our in our end to end tutorial on how to develop multitenant applications with Windows Azure Active Directory.
In this post I will give you a quick overview of the main changes; if you have questions please leave a comment to this post (or in the forums) and we’ll get back to you! And now, without further ado:The New AAL is 100% Managed
As mentioned in the announcement of the first preview, the presence of a native core of AAL was only as a temporary state of affairs. With this release AAL becomes 100% managed, and targeted to any CPU. This represents a tremendous improvement in the ease of use of the library. For example:
- No more need to choose between x86 or x64 NuGets
- No need to worry about bitness of your development platform
- also, no need to worry about use ov IIS vs IIS Express vs Visual Studio Development Server
- No need to worry about bitness of your target platform
- No need to worry about bitness mismatches between your development platform and your target platform
- No need to install the Microsoft Visual C++ Runtime on your target platform
- access to target environments where you would not have been able to install the runtime
- No native/managed barriers in call stacks when debugging
From the feedback we received about this I know that many of you will be happy to hear this :-)
The New AAL is Client-Only
The intention behind the first developer preview of AAL was to provide a deliverable that would satisfy the needs of both service requestors and service providers. The idea was that when you outsource authentication and access control to Windows Azure Active Directory, both the client and the resources role could rely on the directory’s knowledge of the scenario and lighten the burden of what the developer had to explicitly provide in his apps. Also, we worked hard to keep the details of underlying protocols hidden away by our AuthenticationContext abstraction (read more about it here).
Although that worked reasonably well on the client side, things weren’t as straightforward on the service/protected resource side. Namely:
- Having a black box on the service made very difficult to troubleshoot issues
- The black box approach didn’t leave any room for some basic customizations that service authors wanted to apply
- In multi-tenant services you had to construct a different AuthenticationContext per request; definitely possible, but not a simplifying factor
- There are a number of scenarios where the resource developer does not even have a tenant in Windows Azure AD, but expects his callers to have one. In those cases the concept of AuthenticationContext wasn’t just less than useful, it was entirely out of the picture (hence the extension methods that some of you found for ClaimsPrincipal).
Those were some of the conceptual problems. But there were more issues, tied to more practical considerations:
- We wanted to ensure that you can write a client on .NET4.0; the presence of service side features, combined with the .NET 4.0 constraint, forced us to take a dependency on WIF 1.0. That was less than ideal:
- We missed out on the great new features in WIF 4.5
- It introduced a dependency on another package (the WIF runtime)
- Less interesting for you: however for us it would have inflated the matrix of the scenarios we’d have to test and support when eventually moving to 4.5
- The presence of service side features forced us to depend on the full .NET framework, which means that apps written against the client profile (the default for many client project types) would cough
Those were important considerations. We weighted our options, and decided that the AAL approach was better suited for the client role and that the resource role was better served by a more traditional approach. As a result:
- From this release on, AAL only contains client-side features. In a nutshell: you use AAL to obtain a token, but you no longer use AAL for validating it.
- We are introducing new artifacts that will help you to implement the resource side of your scenarios. The first of those new artifacts is the JSON Web Token Handler for the .NET Framework 4.5, which we are releasing in developer preview today. You can read more about it here.
This change further reduced the list of constraints you need to take into account when developing with AAL; in fact, combining this improvement with the fact that we are now 100% managed we were able to get rid of ALL of the gotchas in the release notes of the first preview!
I go in more details about the JWT handler in this other post, but let me spend few words here about its relationship with AAL. The first developer preview already contained most of the de/serialization and validation logic for the JWT format; however it was locked away in AAL’s black box. That made it hard for you to debug JWT-related problems, and impossible to influence its behavior or reuse that logic outside of the (intentionally) narrow scenarios supported by AAL. The JWT format is a rising star in the identity space, and it deserves to be a first class citizen in the .NET framework: which is why we decided to create a dedicated extension for it, to be used whenever and wherever you want with the same ease with which you use WIF’s out-of-box token handlers (in fact, with even more ease :-)). Some more details about this in the next section.
The Samples Are Fully Revamped
The three samples we released with the first developer preview have been adapted to use the new bits. The scenarios they implement remain the same, however the client side projects in the various solutions are now taking advantage of the new “anyCPU” NuGet package; you’ll see that very little has actually changed.
The projects representing protected resources, conversely, no longer have a reference to AAL. Instead, they make use of the new JWT handler to validate the incoming tokens obtained via AAL on the clients. The use of the JWT handler awards you finer control over how you validate incoming tokens.
Of course, with more control the abstraction level plummets: wherever with the old AAL approach you just had to initialize your AuthenticationContext an call Accept(), provided that you were on the blessed path where all settings align, here you have to take control of finding out the validation coordinates and feed them in. It’s not as bad as it sounds: you can still automate the retrieval of settings from metadata (the new samples show how) and the JWT handler is designed to be easy to use even standalone, in absence of the WIF configuration. Furthermore: we are not giving up on making things super-simple on the service side! We are simply starting bottom-up: today we are releasing a preview of token handling logic, moving forward you can expect more artifacts that will build on the more fundamental ones to give you an easier experience for selected scenarios, but without losing control over the finer details if you choose to customize things. Stay tuned!
IMPORTANT: the samples have been upgraded in-place: that means that the bits of the samples referring to the old NuGets are no longer available. More about that later.
Miscellaneous
There are various targeted improvements here and there, below I list the ones you are most likely to encounter:
- For my joy, “AcquireUserCredentialUsingUI” is no more. The same functionality is offered as an overload of AcquireToken.
- There is a new flavor of Credential, ClientCredential, which is used to obtain tokens from Windows Azure Active Directory for calling the Graph on behalf of applications that have been published via the seller dashboard (as shown in the Windows Azure AD session at //BUILD). You can see that in action here.
In the spirit of empowering you to use the protocol directly if you don’t want to rely on libraries, here there’s what happens: when you feed a ClientCredential to an AuthenticationContext and call AcquireToken AAL will send the provided key as a password, whereas SymmetricKeyCredential will use the provided key to perform a signature.- You’ll find that you’ll have an easier time dealing with exceptions
The Old Bits Are Gone
If you made it this far in the post, by know you realized that the changes in this refresh are substantial.
Maintaining a dependency on the old bits would not be very productive, given that those will not be moved forward. Furthermore, given the dev preview state of the libraries (and the fact that we were pretty upfront about changes coming) we do not expect anybody to have any business critical dependencies on those. Add to that the fact that according to NuGet.org no other package is chaining the old bits: the three AAL samples were the only samples we know of that took a dependency on the AAL native core NuGets, and those samples are being revamped to use the new 100% managed NuGet anyway.For all those reasons, we decided to pull the plug on the x86 and x64 NuGets: we hope that nobody will have issues for it! If you have problems because of this please let us know ASAP.
What’s Next
Feedback, feedback, feedback! AAL is already used in various Microsoft properties: but we want to make sure it works for your projects as well!
Of course we didn’t forget that you don't exclusively target .NET on Windows desktop; please continue to send up feedback about what other platforms you’d like us to target with our client and service libraries.We are confident that the improvements we introduced in this release will make it much easier for you to take advantage of AAL in a wider range of scenarios, and we are eager to hear from you about it. Please don’t be shy on the forums :-)


•• Manu Cohen-Yashar (@ManuKahn) reported Visual Studio Identity Support Works with .Net 4.5 Only on 11/20/2012:
Visual Studio has an Identity and Access tool extension which enables simple integration of claim based identity authentication into a web project (WCF and ASP.Net)
It turns out that the tool depends on Windows Identity Framework (WIF) 4.5 which was integrated into the .Net framework and is not compatible with WIF 4.0.
For .Net 4.5 only applications you will see the following when you right click the project.

“Enable Windows Azure Authentication” integrate your project with Windows Azure Active Directory (WAAD). “Identity and Access” integrate your project with Windows Azure Access Control Service (ACS) or any other STS (Identity Provider) including a test STS which will run on your development machine.
If you install the Identity and Access tool extension and you don’t see the above option just change your framework to 4.5.


<Return to section navigation list>
Windows Azure Virtual Machines, Virtual Networks, Web Sites, Connect, RDP and CDN
•• Sandrino di Matteo (@sandrinodm) described using Passive FTP and dynamic ports in IIS8 and Windows Azure Virtual Machines in an 11/19/2012 post:
Today Windows Azure supports up to 150 endpoints which is great for those applications that rely on persistent connections, like an FTP Server. You can run an FTP Server in 2 modes:
- Active mode: The server connects to a negotiated client port
- Passive mode: The client connects to a negotiated server port
Passive mode is by far the most popular choice since it doesn’t require you to open ports on your machine together with firewall exceptions and port forwarding. With passive mode it’s up to the server to open the required ports. Let’s see how we can get an FTP Server running in Passive mode on Windows Azure…
Configuring the endpoints
So I’ve created a new Windows Server 2012 VM in the portal. What we need to do now is open a range of ports (let’s say 100) that can be used by the FTP Server for the data connection. Usually you would do this through the portal:

Adding 100 ports manually through the portal can take some time, that’s why we’ll do it with Powershell. Take a look at the following script:
This simple script does the required work for you:
- Checks if you’re adding more than 150 ports, but it doesn’t check if you already have endpoints defined on the VM
- Add an endpoint for the public FTP port
- Add the range of dynamic ports used for the data connection
Calling it is simple (here I’m opening port 2500 for the control connection and port range 10000-10125 for the data connection on my VM called passiveftp):
And here is the result, all ports have been added:

Configuring the FTP Server
We made the required changes to the endpoints, the only thing we need to do now is configure the FTP Server. First we’ll see how we can configure the server in the UI. The first thing we need to do is add a Web Role and choose to install the FTP Server role services:

Then we need to create a new FTP Site in IIS, configure the port (2500) and set the authentication:


In the portal we opened the tcp ports 10000 to 10125. If we want Passive FTP to work, we need to configure the same range in IIS. This is done in the FTP Firewall Support feature. You’ll need to fill in exactly the same port range together with the public IP of the VM. To find it simply ping the VM (ping xxx.cloudapp.net) or go to the portal.


Finally open the firewall and open the control channel port (2500) and the data channel port range (10000-10125):

And there you go, I’m able to connect to my FTP Server using Passive mode:

Installing and configuring the FTP Server automatically
While it’s great to click around like an IT Pro, it’s always useful to have a script that does all the heavy lifting for you.
This script does… about everything:
- Install IIS with FTP Server
- Create the root directory with the required permissions
- Create the FTP Site
- Activate basic authentication and grant access to all users
- Disable SSL (remove this if you’re using the FTP Site in production)
- Configure the dynamic ports and the public IP
- Open the ports in the firewall
Calling the script is very easy, you simply pass the name of the FTP Site, the root directory, the public port, the data channel range and the public IP. Remember that you need to run this on the VM, not on your own machine.
Both scripts are available on GitHub: https://github.com/sandrinodimattia/WindowsAzure-PassiveFTPinVM


• Himanshu Singh (@himanshuks) reported the availability of New tutorials for SQL Server in Windows Azure Virtual Machines in an 11/19/2012 post to the Windows Azure blog:
We've just released three new tutorials that will help you learn how to use specific features of SQL Server in Windows Azure Virtual Machines:
- Tutorial 1: Connect to SQL Server in the same cloud service: Demonstrates how to connect to SQL Server in the same cloud service within the Windows Azure Virtual Machine environment.
- Tutorial 2: Connect to SQL Server in a different cloud service: Demonstrates how to connect to SQL Server in a different cloud service within the Windows Azure Virtual Machine environment.
Tutorial 3: Connect ASP.NET application to SQL Server in Windows Azure via Virtual Network: Demonstrates how to connect an ASP.NET application (a Web role, platform-as-a-service) to SQL Server in a Windows Azure Virtual Machine (infrastructure-as-a-service) via Windows Azure Virtual Network.
Go and check them out at Tutorials for SQL Server in Windows Azure Virtual Machines in the MSDN library.


Shaun Xu (@shaunxu) described how to Install NPM Packages Automatically for Node.js on Windows Azure Web Site in an 11/15/2012 post:
In one of my previous post I described and demonstrated how to use NPM packages in Node.js and Windows Azure Web Site (WAWS). In that post I used NPM command to install packages, and then use Git for Windows to commit my changes and sync them to WAWS git repository. Then WAWS will trigger a new deployment to host my Node.js application.
Someone may notice that, a NPM package may contains many files and could be a little bit huge. For example, the “azure” package, which is the Windows Azure SDK for Node.js, is about 6MB. Another popular package “express”, which is a rich MVC framework for Node.js, is about 1MB. When I firstly push my codes to Windows Azure, all of them must be uploaded to the cloud.
Is that possible to let Windows Azure download and install these packages for us? In this post, I will introduce how to make WAWS install all required packages for us when deploying.
Let’s Start with Demo
Demo is most straightforward. Let’s create a new WAWS and clone it to my local disk. Drag the folder into Git for Windows so that it can help us commit and push.
Please refer to this post if you are not familiar with how to use Windows Azure Web Site, Git deployment, git clone and Git for Windows.
And then open a command windows and install a package in our code folder. Let’s say I want to install “express”.

And then created a new Node.js file named “server.js” and pasted the code as below.
1: var express = require("express");2: var app = express();3:4: app.get("/", function(req, res) {5: res.send("Hello Node.js and Express.");6: });7:8: console.log("Web application opened.");9: app.listen(process.env.PORT);If we switch to Git for Windows right now we will find that it detected the changes we made, which includes the “server.js” and all files under “node_modules” folder. What we need to upload should only be our source code, but the huge package files also have to be uploaded as well. Now I will show you how to exclude them and let Windows Azure install the package on the cloud.
First we need to add a special file named “.gitignore”. It seems cannot be done directly from the file explorer since this file only contains extension name. So we need to do it from command line. Navigate to the local repository folder and execute the command below to create an empty file named “.gitignore”. If the command windows asked for input just press Enter.
1: echo > .gitignore

Now open this file and copy the content below and save.
1: node_modulesNow if we switch to Git for Windows we will found that the packages under the “node_modules” were not in the change list. So now if we commit and push, the “express” packages will not be uploaded to Windows Azure.

Second, let’s tell Windows Azure which packages it needs to install when deploying. Create another file named “package.json” and copy the content below into that file and save.
1: {2: "name": "npmdemo",3: "version": "1.0.0",4: "dependencies": {5: "express": "*"6: }7: }Now back to Git for Windows, commit our changes and push it to WAWS.

Then let’s open the WAWS in developer portal, we will see that there’s a new deployment finished. Click the arrow right side of this deployment we can see how WAWS handle this deployment. Especially we can find WAWS executed NPM.

And if we opened the log we can review what command WAWS executed to install the packages and the installation output messages. As you can see WAWS installed “express” for me from the cloud side, so that I don’t need to upload the whole bunch of the package to Azure.

Open this website and we can see the result, which proved the “express” had been installed successfully.

What’s Happened Under the Hood
Now let’s explain a bit on what the “.gitignore” and “package.json” mean.
The “.gitignore” is an ignore configuration file for git repository. All files and folders listed in the “.gitignore” will be skipped from git push. In the example below I copied “node_modules” into this file in my local repository. This means, do not track and upload all files under the “node_modules” folder. So by using “.gitignore” I skipped all packages from uploading to Windows Azure.
“.gitignore” can contain files, folders. It can also contain the files and folders that we do NOT want to ignore. In the next section we will see how to use the un-ignore syntax to make the SQL package included.
The “package.json” file is the package definition file for Node.js application. We can define the application name, version, description, author, etc. information in it in JSON format. And we can also put the dependent packages as well, to indicate which packages this Node.js application is needed.
In WAWS, name and version is necessary. And when a deployment happened, WAWS will look into this file, find the dependent packages, execute the NPM command to install them one by one. So in the demo above I copied “express” into this file so that WAWS will install it for me automatically.
I updated the dependencies section of the “package.json” file manually. But this can be done partially automatically. If we have a valid “package.json” in our local repository, then when we are going to install some packages we can specify “--save” parameter in “npm install” command, so that NPM will help us upgrade the dependencies part.
For example, when I wanted to install “azure” package I should execute the command as below. Note that I added “--save” with the command.
1: npm install azure --saveOnce it finished my “package.json” will be updated automatically.

Each dependent packages will be presented here. The JSON key is the package name while the value is the version range. Below is a brief list of the version range format. For more information about the “package.json” please refer here.

And WAWS will install the proper version of the packages based on what you defined here. The process of WAWS git deployment and NPM installation would be like this.

But Some Packages…
As we know, when we specified the dependencies in “package.json” WAWS will download and install them on the cloud. For most of packages it works very well. But there are some special packages may not work. This means, if the package installation needs some special environment restraints it might be failed.
For example, the SQL Server Driver for Node.js package needs “node-gyp”, Python and C++ 2010 installed on the target machine during the NPM installation. If we just put the “msnodesql” in “package.json” file and push it to WAWS, the deployment will be failed since there’s no “node-gyp”, Python and C++ 2010 in the WAWS virtual machine.
For example, the “server.js” file.
1: var express = require("express");2: var app = express();3:4: app.get("/", function(req, res) {5: res.send("Hello Node.js and Express.");6: });7:8: var sql = require("msnodesql");9: var connectionString = "Driver={SQL Server Native Client 10.0};Server=tcp:tqy4c0isfr.database.windows.net,1433;Database=msteched2012;Uid=shaunxu@tqy4c0isfr;Pwd=P@ssw0rd123;Encrypt=yes;Connection Timeout=30;";10: app.get("/sql", function (req, res) {11: sql.open(connectionString, function (err, conn) {12: if (err) {13: console.log(err);14: res.send(500, "Cannot open connection.");15: }16: else {17: conn.queryRaw("SELECT * FROM [Resource]", function (err, results) {18: if (err) {19: console.log(err);20: res.send(500, "Cannot retrieve records.");21: }22: else {23: res.json(results);24: }25: });26: }27: });28: });29:30: console.log("Web application opened.");31: app.listen(process.env.PORT);The “package.json” file.
1: {2: "name": "npmdemo",3: "version": "1.0.0",4: "dependencies": {5: "express": "*",6: "msnodesql": "*"7: }8: }And it failed to deploy to WAWS.

From the NPM log we can see it’s because “msnodesql” cannot be installed on WAWS.

The solution is, in “.gitignore” file we should ignore all packages except the “msnodesql”, and upload the package by ourselves. This can be done by use the content as below. We firstly un-ignored the “node_modules” folder. And then we ignored all sub folders but need git to check each sub folders. And then we un-ignore one of the sub folders named “msnodesql” which is the SQL Server Node.js Driver.
1: !node_modules/2:3: node_modules/*4: !node_modules/msnodesqlFor more information about the syntax of “.gitignore” please refer to this thread.
Now if we go to Git for Windows we will find the “msnodesql” was included in the uncommitted set while “express” was not. I also need remove the dependency of “msnodesql” from “package.json”.

Commit and push to WAWS. Now we can see the deployment successfully done.

And then we can use the Windows Azure SQL Database from our Node.js application through the “msnodesql” package we uploaded.

Summary
In this post I demonstrated how to leverage the deployment process of Windows Azure Web Site to install NPM packages during the publish action. With the “.gitignore” and “package.json” file we can ignore the dependent packages from our Node.js and let Windows Azure Web Site download and install them while deployed.
For some special packages that cannot be installed by Windows Azure Web Site, such as “msnodesql”, we can put them into the publish payload as well.
With the combination of Windows Azure Web Site, Node.js and NPM it makes even more easy and quick for us to develop and deploy our Node.js application to the cloud.


<Return to section navigation list>
Live Windows Azure Apps, APIs, Tools and Test Harnesses
•• Brian Benz started a Using LucidWorks on Windows Azure (Part 1 of a multi-part MS Open Tech series) series on 11/20/2012:
LucidWorks Search on Windows Azure delivers a high-performance search service based on Apache Lucene/Solr open source indexing and search technology. This service enables quick and easy provisioning of Lucene/Solr search functionality on Windows Azure without any need to manage and operate Lucene/Solr servers, and it supports pre-built connectors for various types of enterprise data, structured data, unstructured data and web sites.
In June, we shared an overview of the LucidWorks Search service for Windows Azure. For this post, the first in a series, we’ll cover a few of the concepts you need to know to get the most out of the LucidWorks search service on Windows Azure. In future posts we’ll show you how to set up a LucidWorks service on Windows Azure and demonstrate how to integrate search with Web sites, unstructured data and structured data.
Options for Developers
Developers can add search to their existing Web Sites, or create a new Windows Azure Web site with search as a central function. For example, in future posts in this series, we’ll create a simple Windows Azure web site that will use the LucidWorks search service to index and search the contents of other Web sites. Then we’ll enable search from the same demo Web site against a set of unstructured data and MySQL structured data in other locations.
Overview: Documents, Fields, and Collections
LucidWorks creates an index of unstructured and structured data. Any individual item that is indexed and/or searched is called a Document. Documents can be a row in a structured data source or a file in an unstructured data source, or anything else that Solr/Lucene understands.
An individual item in a Document is called a Field. Same concept – fields can be columns of data in a structured source or a word in an unstructured source, or anything in between. Fields are generally atomic, in other words they cannot be broken down into smaller items.
LucidWorks calls groups of Documents that can be managed and searched independently of each other Collections. Searching, by default is on one collection at a time, but of course programmatically a developer can create search functionality that returns results for more than one Collection.
Security via Collections and Filters
Collections are a great way to restrict a group of users, controlled by access to Windows Azure Web sites and by LucidWorks. In addition, LucidWorks Admins can create Filters inside a Collection. User identity can be integrated with an existing LDAP directory, or managed programmatically via API.
LucidWorks additional Features
LucidWorks adds value to Solr/Lucene with some very useful UI enhancements that can be enabled without programming.
Persistent Queries and Alerts, Auto-complete, spellcheck and similar terms.
Users can create their own persistent queries. Search terms are automatically monitored and Alerts are delivered to a specified email address using the Name of the alert as the subject line. You can also specify how often the persistent query should check for new data and how often alerts are generated.
Search term Typeahead can be enabled via LucidWorks’ auto-complete functionality. Auto-complete tracks the characters the user has already entered and displays terms that start with those characters.
When results re displayed, LucidWorks can spell-check queries and offer alternative terms based on similar spellings of words and synonyms in the query.
Stopwords
Search engines use Stopwords to remove common words from queries and query indexes like “a”, “and”, or “for” that add no value to searches. LucidWorks has an editable list of Stopwords that is a great start to increase search relevance.
Increasing Relevance with Click Scoring
Click scoring tracks common queries and query results and tracks which results are most often selected against query terms and scores relevance based on the comparison results. Results with a higher relevance are placed higher in search result rankings, based on user activity.
LucidWorks on Windows Azure – Easy Deployment
The best part of LucidWorks is how easily Enterprise Search can be added as a service. In our next LucidWorks blog post we’ll cover how to quickly get up and running with Enterprise search by adding a LucidWorks service to an existing Windows Azure Web site.
• Brihadish Koushik posted SignalR Demystified – Part 2 to the Aditi Technologies blog on 11/20/2012:

I believe you are now comfortable with the basics of SignalR. If you have bumped into this post directly and have no idea whatsoever what ‘SignalR’ is, then do read up on the first part of this blog series.
If your memories serves you well, (I know mine isn't particularly stellar) then you will remember the chat room sample in the previous post. Let’s say that we want to improve the sample by introducing support for creating new chat rooms and let the users join and leave them as and when they choose to.
Server side logic seems pretty straight forward isn't it; just add more options in the ‘MessageType’ and update the ‘OnReceivedAsync’ method’s switch case to put up processing for the newly introduced options. However you will realize that it will change just about everything we wrote the last time, even though quantitatively speaking the change isn't much. But what about software design guidelines that advocate easy extensibility with minimal code change? The previous sample sure does come a cropper in that area. And if you choose to further zoom-in, then you will detect the following gotchas too.
1. Adding new pages means you would have to register corresponding paths for them to be included in the SignalR wiring through its async http handler.
2. Having a static data structure for keeping a correlation between the connection and client name. Ideally, keeping state information locally on server is not very helpful in scaling out.
As if they haven’t helped us enough already, SignalR authors decided to carry on being altruistic and give us the feature ‘Hubs’ which lets us handle the situation elegantly enough. ‘Hubs’ allows the client to invoke specific methods on the server and vice versa. Sounds familiar, right? Well it definitely should since this is pretty much getting to perform RPC without the hassle of having a binary dependency and more importantly in a truly platform independent manner. “Hold it right there buddy….” might be what you are thinking because I couldn’t believe it either when I read about it the first time. So, let’s not waste any more time and dive right into a hub.
Getting Started
Setup
Open the previously created ‘HelloWorldChatRoom.sln’ and add a new aspx page named ‘HelloWorldChatRoomHub.aspx’ and wire it up with navigation menu through the item ‘Chat Hub’.

Hub API
We now have the basic infra ready to start giving shape to our chat room hub. Following sections describe the authoring of sample from ‘server’ and ‘client’ perspectives.
ServerAs the name suggests, a SignalR hub represents a logical endpoint in the server to which multiple clients connect to send and receive messages. Clients connect to a hub over an OOB implementation of ‘SignalR.PersistentConnection’ named ‘SignalR.HubDispatcher’. Since all hubs will use ‘HubDispatcher’, the user is at once relieved of registering routes when defining new hubs. The connections to all hubs happen on the route ‘‘~/signalr/{operation*}’.
As a first step, we need to define a hub to represent our chat room. So, let’s define a type named ‘ChatRoomHub’ inside ‘HelloWorldChatRoomHub.aspx’ and inherit it form the class ‘SignalR.Hub’. The base implementation provides access to the ‘caller’ (i.e. the client on the other end of the logical connection), list of connected clients and contextual information pertaining to the connection. All we have to do is write a ‘processor’ for each type of message that will be sent by the client. We accomplish it with the following code:
[HubName("ChatRoom")]
public class ChatRoomHub : Hub
{
public void Join(string userName)
{
this.Caller.Name = userName;
this.Clients.receiveMessage(string.Format("{0} joined and says 'Hello World'", userName));
}
public void SendMessage(string message)
{
this.Clients.receiveMessage(string.Format("{0} says {1}", this.Caller.Name, message));
}
}
Wow! Do you see how concise (to the point of being smug), elegant and simple this implementation looks as compared to ‘ChatRoomConnection’ in the previous post? Of course, I will elucidate on the API so that the above code makes sense to you. The following table explains the properties exposed by ‘SignalR.Hub’:

I have deliberately skipped talking about the property ‘Groups’ as it is a separate feature that warrants a dedicated post (follows after the current one).
You must have realized that the method ‘receiveMessage’ and property ‘Name’ have not been defined for ‘Clients’, if in case you had assumed they were a part of API. Now don’t get flummoxed or intimidated as the logic is quite simple (if you have figured out by now, then a ‘pat in the back’ is called for). ‘Dynamic object’ allows resolving the behavior of a ‘member’ or ‘method’ at runtime. The C# compiler is told to ignore doing compile time verification by using the term ‘dynamic’ for declaration. If you navigate to the definition of ‘Hub’, you will notice the usage of ‘dynamic’ for declaring the properties ‘Caller’ and ‘Clients’.

The ‘dynamic object’ feature was introduced in .NET 4.0 and C# 4.0; you can find more details here. Behind the scenes, the call to method ‘receiveMessage’ is translated into ‘sending’ a metadata JSON to the client for executing the method ‘receiveMessage’ that would be defined in the client script. The property ‘Name’ will be sent as key-value pair within the attribute ‘State’ of the JSON object and will be included in all further communication over the ‘persistent connection’. (Works pretty much like a cookie without its limitations.)
Client
The client side logic remains fairly similar to the one we had while dealing with ‘persistent connection’ in the previous post. However, since JavaScript does not support the concept of ‘dynamic object’, there needs to be mechanism to have proxies for the methods defined in hub and include them as a part of client side scripting infra. Once again staying consistent with its elegant style, SignalR achieves this rather ingenuously. Before elucidating further, let me show you the client code.
The HTML is same as the one we used in previous post. If you were expecting to see some decent CSS this time, then sorry to disappoint you. The only change is the introduction of new script file. Add a javascript file named ‘HelloWorldChatRoomHub.js’ to the ‘Scripts’ folder.
<%@ Page Title="" Language="C#" MasterPageFile="~/Site.Master" AutoEventWireup="true" CodeBehind="HelloWorldChatRoomHub.aspx.cs" Inherits="HelloWorldChatRoom.HelloWorldChatRoomHub" %>
<asp:Content ID="Content1" ContentPlaceHolderID="HeadContent" runat="server">
<script type="text/javascript" src="Scripts/jquery-1.6.4.js"></script>
<script type="text/javascript" src="Scripts/jquery.signalR-0.5.2.js"></script>
<script type="text/javascript" src="signalr/hubs"></script>
<script type="text/javascript" src="Scripts/HelloWorldChatRoomHub.js"></script>
</asp:Content>
<asp:Content ID="Content2" ContentPlaceHolderID="MainContent" runat="server">
<div id="client">
<label id="labelName">Enter Name::</label>
<input id="inputName" type="text" />
<input id="join" type="button" value="Join" />
</div>
<div id="messages">
<ul id="messageList"></ul>
</div>
<div>
<input id="inputMessage" type="text" />
<input id="sendMessage" type="button" value="Broadcast Message" />
</div>
</asp:Content>
(function ($, window) {
$(function () {
// disable 'Boradcast Message' button till client joins the chat room.
$("#sendMessage").prop('disabled', true);
var chatRoom = $.connection.chatRoom;
$.connection.hub.start(function () {
$("#sendMessage").click(function () {
try {
chatRoom.sendMessage($("#inputMessage").val());
}
catch (e) {
alert("Unable to send due to error: " + e.Message);
}
});
$("#join").click(function () {
try {
chatRoom.join($("#inputName").val());
$("#sendMessage").prop('disabled', false);
}
catch (e) {
alert("Unable to join due to error: " + e.Message);
}
});
});
chatRoom.receiveMessage = function (message) {
$("
").html(message).appendTo($("#messageList")); }
});
})(window.jQuery, window);
Notice the script tag whose source is set to ‘/signalR/hubs’. This subtle yet powerful maneuver results in dynamic generation of proxy JavaScript objects and methods which are then downloaded and added to the current page. The interesting aspect here is that script delivered from the path ‘/signalR/hubs’ is not ‘static’, but is actually processed by ‘SignalR.HubDispatcher’ to generate the script on the fly. The following intercept from the fiddler will help you put this dynamic proxy generation into context.

The highlighted part in the response panel shows the proxy object created for the chat room hub. The object ‘signalR’ is another alias for the object ‘$.connection’ that we had used in the previous post. Remember the attribute ‘HubName’ on the ‘ChatRoomHub’ class, the value specified in it is used as the name of the hub’s proxy object ($.connection.chatRoom). Without the attribute, the name of the hub class would have been used. Notice that proxy generation uses ‘camel casing’ for naming the objects, like ‘join’ instead of ‘Join’, ‘chatRoom’ instead of ‘ChatRoom’. Below are the similarities in client script w.r.t the one in previous post:
1. The object ‘$.connection.hub’ is initialized to point to the relative path ‘signalr’, which is the used by all hubs. (This is in essence similar to the statement ‘ $.connection.hub = $.connection("HelloWorldChatRoom");’ used in previous post.)
2. The ‘start’ method is called to establish the ‘persistent connection’.
The only deviation is the calls to the proxy methods ‘join’ and ‘sendMessage’. The proxy methods translate the calls into ‘sending’ metadata JSON to the server for executing the corresponding methods defined in ‘ChatRoomHub’.
Hub in Action
Let’s go ahead and run the sample and yet again make use of fiddler (enable ‘stream’ mode) to have a peek at the way RPC calls are marshaled as metadata JSON objects. Hit F5 and navigate to the ‘Chat Room Hub’ page.

Your fiddler screen should appear similar to the following snapshot.

As expected, the script containing the hub proxy objects and methods are downloaded first, followed by negotiation and establishing of the ‘persistent connection’ (behind the scenes it’s the OOB implementation of ‘SignalR.HubDispatcher’)
Enter your name and then click on ‘Join’. Then write a message for broadcast and click ‘Broadcast Message’.

You will now see two additional entries in fiddler, highlighted below in red box. The entries correspond to the two operations that we performed i.e. joining the chat room and broadcasting a message.

Using fiddler’s ‘text wizard’ to decode the data that was sent as part of the two requests will fetch us the following:
1. {"hub":"ChatRoom","method":"Join","args":["brihadish"],"state":{},"id":0}
2. {"hub":"ChatRoom","method":"SendMessage","args":["im a fan of signalR hubs."],"state":{"Name":"brihadish"},"id":1}
I bet you can now see the pieces of the RPC story from client to server fall into place J. The client proxy methods simply send JSON specifying the hub name, method name and arguments which are then used by ‘SignalR.HubDispatcher’ to construct the hub object and invoke the method using the specified arguments. Furthermore, the argument can themselves be JSON objects. You would have noticed the presence of attribute ‘state’ in the JSON pertaining to the second request. Remember the use of ‘Name’ property on the dynamic object ‘Clients’ in the hub method ‘Join’. If you look at the fiddler image above, you can see that a ‘state’ attribute was included in the hub response for the first request.
Now to see the RPC story from server to client, open another tab for the chat room hub page. Then proceed to join the chat room and broadcast a message.

As expected, the broadcasted messages has been received in the previously opened tab.

Press F12 to bring up the developer tools for inspecting the action that took place in the client side.

Similar to the previous post, the script tag in the ‘head’ is the server response for successfully establishing the connection and it contains the following script.
var $ = window.parent.jQuery,
ff = $ ? $.signalR.transports.foreverFrame : null,
c = ff ? ff.getConnection('1') : null,
r = ff ? ff.receive : function() {};
ff ? ff.started(c) : '';
Again, similar to the previous post two script tags are added to the ‘body’ to correspond to the two messages that were broadcasted. The first script tag added to the ‘body’ contains the following script which calls the method ‘ff.receive’ (using the variable ‘r’) thus invoking the event handler ‘$connection.received’ which then invokes the callback we registered with it.
Text - {"MessageId":"14","Messages":[{"Hub":"ChatRoom","Method":"receiveMessage","Args":["koushik joined and says 'Hello World'"]}],"Disconnect":false,"TimedOut":false,"TransportData":{}}
You will notice that the message is however different from the one in previous post and contains JSON rather than pure text. Also, we did not register any callback in ‘HelloWorldChatRoomHub.js’ and instead defined the method ‘receiveMessage’.
The missing piece in the wiring i.e. the event handler to invoke the method ‘receiveMessage’ by interpreting the JSON is provided by the dynamic script downloaded via ‘signalR/hubs’ as shown below.
…………………………….
signalR.hub = signalR("/signalr")
.starting(function () {
updateClientMembers(signalR);
})
.sending(function () {
var localHubs = [];
$.each(hubs, function (key) {
localHubs.push({ name: key });
});
this.data = window.JSON.stringify(localHubs);
})
.received(function (result) {
var callbackId, cb;
if (result) {
if (!result.Id) {
executeCallback(result.Hub, result.Method, result.Args, result.State);
} else {
callbackId = result.Id.toString();
cb = callbacks[callbackId];
if (cb) {
callbacks[callbackId] = null;
delete callbacks[callbackId];
cb.callback.call(cb.scope, result);
}
}
}
});
…………………………………..
Conclusion of this post… do you think we need one?

Many screen captures would be more readable if they were cropped to the active content, rather than full screen.
• Scott Guthrie (@scottgu) updated his SharePoint Apps and Windows Azure post on Sunday evening 11/18/2012:
Last Monday I had an opportunity to present as part of the keynote of this year’s SharePoint Conference. My segment of the keynote covered the new SharePoint Cloud App Model we are introducing as part of the upcoming SharePoint 2013 and Office 365 releases. This new app model for SharePoint is additive to the full trust solutions developers write today, and is built around three core tenants:
- Simplifying the development model and making it consistent between the on-premises version of SharePoint and SharePoint Online provided with Office 365.
- Making the execution model loosely coupled – and enabling developers to build apps and write code that can run outside of the core SharePoint service. This makes it easy to deploy SharePoint apps using Windows Azure, and avoid having to worry about breaking SharePoint and the apps within it when something is upgraded. This new loosely coupled model also enables developers to write SharePoint applications that can leverage the full capabilities of the .NET Framework – including ASP.NET Web Forms 4.5, ASP.NET MVC 4, ASP.NET Web API, EF 5, Async, and more.
- Implementing this loosely coupled model using standard web protocols – like OAuth, JSON, and REST APIs – that enable developers to re-use skills and tools, and easily integrate SharePoint with Web and Mobile application architectures.
A video of my talk + demos is now available to watch online:

In the talk I walked through building an app from scratch – it showed off how easy it is to build solutions using new SharePoint application, and highlighted a web + workflow + mobile scenario that integrates SharePoint with code hosted on Windows Azure (all built using Visual Studio 2012 and ASP.NET 4.5 – including MVC and Web API).
The new SharePoint Cloud App Model is something that I think is pretty exciting, and it is going to make it a lot easier to build SharePoint apps using the full power of both Windows Azure and the .NET Framework. Using Windows Azure to easily extend SaaS based solutions like Office 365 is also a really natural fit and one that is going to offer a bunch of great developer opportunities.

• Brian Swan (@brian_swan) reported PHP 5.4 available in Windows Azure Web Sites in an 11/18/2012 post to the [Windows Azure’s] Silver Lining blog:
I’m happy to share that PHP 5.4 is now available in Windows Azure Web Sites! You have always been able to install a custom PHP runtime in Web Sites, but now you can have PHP 5.4 available with the click of a button. And, you can customize the runtime (add/enable extensions, modify configuration settings). Details are in the instructions and links below…
1. Create a website. Any of the following articles will walk you through how to do this.
- How to Create and Deploy a Website
- Create a PHP-MySQL website and deploy using Git
- Create and deploy a PHP-MySQL website using WebMatrix
2. Click on the name of your site in the Windows Azure Portal:
3. Browse to the CONFIGURE tab, and select PHP 5.4 (notice that PHP 5.3 is enabled by default):
4. Click SAVE at the bottom of the screen:
If you browse to a script that calls phpinfo(), you should see this:
Of course, you can always revert back to PHP 5.3. And, you can still customize the built-in PHP runtime, or you can provide your own customized PHP runtime: How to configure PHP in Windows Azure Web Sites.
As always, we’d love to hear your feedback.


Tyler Doerksen (@tyler_gd) described issues with Upgrading to Azure SDK 1.8 in an 11/15/2012 post:
Recently I had to work with an older Azure solution which was originally written on Visual Studio 2010 and Windows Azure SDK 1.6. When I opened the solution in VS 2012 it prompted me to upgrade the SDK version which caused a few problems. In this post I will go over a few of the main ones.
As an example (because I cannot use my real solution) I will be downloading and upgrading the BlobShare sample solution from http://blobshare.codeplex.com. This is a fairly complex solution published about a year ago. To build it requires the WIF (Windows Identity Framework SDK) and Azure SDK installed on your machine.
Opening the solution for the first time in VS2012
The first message is from Visual Studio saying that one of the projects requires a “One-way Upgrade”. In this case the project is the Azure BlobShare.ccproj. Once the solution is open you can look at the properties of the Azure project and see that it has been upgraded to October 2012.

At first you may be thinking “Great!” but then you try and compile and get a bunch of errors.
Missing the ServiceRuntime namespace
So once you compile you may get a number of reference missing warnings and compilation errors like this.
Could not resolve this reference. Could not locate the assembly “Microsoft.WindowsAzure.ServiceRuntime, Version=1.0.0.0, Culture=neutral, PublicKeyToken=31bf3856ad364e35, processorArchitecture=MSIL”. Check to make sure the assembly exists on disk. If this reference is required by your code, you may get compilation errors.
The resolution to this is to remove and re-add the ServiceRuntime reference. The new reference should show Version 1.8.0.0
There are a few Azure libraries that have been added to NuGet but the Service Runtime assembly is not one of them.
Azure Storage Client Version 2.0
Occasionally when Visual Studio upgrades the projects it may add version 2.0 of the Storage Client library to the project. If that happens you will know from a large amount of errors. After version 1.7, 2.0 introduced a number of breaking changes to the framework.
To re-add version 1.7 to your projects, just use the NuGet package manager console.
Install-Package WindowsAzure.Storage -Version 1.7.0.0
After running that command in the package manager, you should not get any more storage API errors. I do recommend upgrading to the newest version of the storage library. Here is an article about the significant breaking changes in the library. Windows Azure Storage Team Blog
Once you get all of those straightened out you should have a successful compilation.
If you have any other problems with your solution upgrades, feel free to comment below or drop me a line at tylergd@outlook.com


<Return to section navigation list>
Visual Studio LightSwitch and Entity Framework 4.1+
•• The Video Studio LightSwitch (@VSLightSwitch) Team described How to: Control Navigation between HTML Screens in a LightSwitch App in a late November 2012 article:
As part of designing an HMTL client for a Visual Studio LightSwitch application, you specify what action a user must perform to open one screen from another. You also specify which changes the user must save or discard before the new screen appears. For example, you might want users to open Screen2 by tapping a button on the home page, and you might want them to save or discard all changes before Screen2 appears. In that case, you would set the ItemTap action of that button to showScreen2, and you would set the task for that action to Save.
Navigation follows the same forward/backward model as a web browser.


To control navigation
In Solution Explorer, open the screen from which users will open a different screen.
In the Screen Designer, in the Screen Content Tree, choose the element that users will tap to open the new screen.
You can choose a collection node or a button.
In the Properties window, choose the Item Tap link.
In the Edit ItemTap Action dialog box, choose the Choose an existing method option button.
In the showTab list, choose showScreenName, where ScreenName is the screen that you want to open.
In the Task list, choose Save, OK/Cancel, or Back, and then choose the OK button.
Other Resources

• Joe Binder of the Visual Studio Lightswitch Team described a A New API for LightSwitch Server Interaction: The ServerApplicationContext (Joe Binder) in an 11/19/2012 post:
Although the team has focused on building the LightSwitch HTML client and SharePoint 2013 applications recently, supporting existing scenarios remains a top priority. We’ve tried to balance our new investments with solutions to roadblocks and pain points in Visual Studio 2012 that we’ve heard consistently through the forums and through direct customer chats. Some of the more pervasive pain points we’ve heard call for communication between the client and LightSwitch middle-tier using something other than the save pipeline that’s built into all LightSwitch applications. Requirements we commonly hear are as follows:
- I need to kick off a workflow/process on the LightSwitch middle tier from the client.
- My client needs to retrieve non-entity data from the LightSwitch middle-tier.
- I need to upload a file to the middle-tier from the client and store it in a remote location (e.g., SharePoint)
- I need some standalone UI (i.e., an aspx page) that reads and writes LightSwitch data
To date, the solutions we’ve offered to these scenarios involved custom RIA services or using “dummy” entities to pass messages between the client and middle-tier. It was cumbersome and complex. We’ve added a simple but powerful API to the LightSwitch middle-tier to address some these scenarios in the near-term—the ServerApplicationContext.
Before we delve into details, though, you might want to check out a series of earlier posts that describes the anatomy of a LightSwitch application: this new API builds on an understanding of the LightSwitch middle-tier.
Getting Started
The ServerApplicationContext is only available in the HTML Client Preview 2; it is not available in Visual Studio 2012. We’ll illustrate the API by creating a new project, but you can upgrade your existing projects to use Preview 2 by adding an HTML client—just right-click the project and select “Add Client”. (Please note that projects upgraded to or created with Preview 2 are not compatible with Visual Studio 2012.)

A WebAPI Example
The ServerApplicationContext API allows server-side code to access the LightSwitch middle-tier’s data workspace and metadata. We’ll illustrate how you can call this new API from an HTML Client using WebAPI, although you can use the ServerApplicationContext in a similar fashion with ASP.NET Web Forms and MVC. If you’re not familiar with WebAPI, you might want to check out the Getting Started series on the ASP.NET blog for a primer on the technology.
Create a New Project
Begin by creating a simple new HTML Client Application.

Now add a Contact entity and add fields for the first and last names:

Add a browse screen to display the list of contacts:

Add a screen we can use to create new contact entities

We’ll just wire the two screens up by adding a button to the “BrowseContacts” screen and configure it to show the “ContactDetail” screen:


Run the application and add a few contact entries.
Add WebAPI support to the Server Project
We need to add some new content and references to the LightSwitch server project before we can use WebAPI; we’ll use the Visual Studio templates to add these.
1. Use the “Toggle View” button in Solution Explorer to switch to File View for the project.

2. Select the Server project and gesture to “Add New Item”

3. Select the “WebAPI Controller” template. Name the new item “ContactsController”

4. Next we need to add an Http route to our WebAPI in the server project. We’ll do this by adding a Global.asax item to the server project.

5. Add the following using statements to the resulting Global.asax.cs file.
using System.Web.Routing;
using System.Web.Http;
6. Now add the following HttpRoute to the start method.
protected void Application_Start(object sender, EventArgs e)
{
    RouteTable.Routes.MapHttpRoute(
        name: "DefaultApi",
        routeTemplate: "api/{controller}/{id}",
        defaults: new { id = System.Web.Http.RouteParameter.Optional }
        );
}
The above steps add a WebAPI endpoint to the LightSwitch middle-tier. If you run the application again, you can browse to ~/api/contacts under the application root (i.e., http://localhost:[Port]/api/contacts) to see the result of the Get() method on our ContactsController.
Authoring a Controller for a LightSwitch entity
Querying the data workspace
The ContactsController is just returning dummy data right now. We’ll update it to return data from LightSwitch using the ServerApplicationContext.
1. Open the ContactsController class and add the following using statements. The latter will cause some useful extension methods on our LightSwitch entity APIs.
using System.Collections;
using Microsoft.LightSwitch;
2. Change the Get method to return an IEnumerable of strings. For simplicity, we’ll just return the last name of each contact
// GET api/contacts
public IEnumerable<string> Get()
{
    using (var serverContext = LightSwitchApplication.Application.CreateContext())
    {
        return from c in serverContext.DataWorkspace.ApplicationData.
                         Contacts.GetQuery().Execute()
               select c.LastName;

    }
}
3. The ServerApplicationContext instance is returned from “LightSwitchApplication.Application.CreateContext”. Drilling into this a bit, you can see that the returned object is strongly typed and you can interact with the DataWorkspace using the same object model that’s used in entity code-behind:

The context returned from CreateContext() is a disposable object; instantiating it with a using statement ensures that it is disposed properly. (Below is an alternate way of disposing it.)
4. We can implement a scalar entity lookup method similarly:
 // GET api/contacts/<id>
public string Get(int id)
{
    using (var serverContext = LightSwitchApplication.Application.CreateContext())
    {
        return (from c in serverContext.DataWorkspace.ApplicationData.
                          Contacts.GetQuery().Execute()
                where c.Id == id
                select c.LastName).FirstOrDefault();
    }
}
Updating the DataWorkspace
It’s important to remember that any changes made using the server data context must be save explicitly, whereas changes made in the save pipeline are saved automatically. For example, if we include delete support in the ContactsController, we need to call SaveChanges() after the respective entity is marked for deletion:
// DELETE api/contacts/<id>
public void Delete(int id)
{
    using (var serverContext = LightSwitchApplication.Application.CreateContext())
    {
        var contact =
            serverContext.DataWorkspace.ApplicationData.Contacts_SingleOrDefault(id);

        if (contact != null)
        {
            contact.Delete();
            serverContext.DataWorkspace.ApplicationData.SaveChanges();
        }
    }
}
Caching the server context
While the above code snippets illustrate the basic usage patterns for the server context, it may be advantageous to cache and share a single instance of the server context in all of our controller methods. We can update the code as follows to do just that. Here is the complete listing:
using System; using System.Collections.Generic; using System.Linq; using System.Net; using System.Net.Http; using System.Web.Http; using Microsoft.LightSwitch; using System.Collections; namespace LightSwitchApplication { /// <summary> /// A simple WebAPI controller that returns a list of LightSwitch contacts /// </summary> public class ContactsController : ApiController { // GET api/contacts public IEnumerable<string> Get() { return from c in DataWorkspace.ApplicationData. Contacts.GetQuery().Execute() select c.LastName; } // GET api/contacts/<id> public string Get(int id) { return (from c in DataWorkspace.ApplicationData.Contacts.GetQuery().Execute() where c.Id == id select c.LastName).FirstOrDefault(); } // DELETE api/contacts/<id> public void Delete(int id) { var contact = DataWorkspace.ApplicationData.Contacts_SingleOrDefault(id); if (contact != null) { contact.Delete(); DataWorkspace.ApplicationData.SaveChanges(); } } private bool ownServerContext; /// <summary> /// Returns the data workspace for the server context /// </summary> protected LightSwitchApplication.DataWorkspace DataWorkspace { get { // The server context is automatically cached in the "Current" property if (ServerApplicationContext.Current == null) { this.ownServerContext = true; ServerApplicationContext.CreateContext(); } else { this.ownServerContext = false; } return ServerApplicationContext.Current.DataWorkspace; } }protected override void Dispose(bool disposing) { try {
if (disposing) { if (this.ownServerContext &&
ServerApplicationContext.Current != null &&
!ServerApplicationContext.Current.IsDisposed) { ServerApplicationContext.Current.Dispose(); } } } finally { base.Dispose(disposing); }
}} }Try it out!
With our controller implemented, we can use the browser to exercise the Get(…) methods. Run the application and browse to http://localhost:[Port]/api/contacts in a separate browser tab to verify that the list of last names is returned; http://localhost:[Port]/api/contacts/1/ will return the contact with the id of 1. You can set breakpoints on the controller methods to step through the code.
This is a simple sample intended to get you started. You can author client-side code on virtually any platform to interact with the LightSwitch middle-tier using this approach.
API Details
While this ServerApplicationContext API is relatively simple, it has a few nuances that may not be readily apparent from the above code sample.
Security restrictions
Foremost, the API has the same authentication requirements as all other endpoints exposed on the LightSwitch middle-tier: the ServerApplicationContext does not open a “back door” to your LightSwitch middle-tier. The API retrieves the identity of the caller from the ambient HttpContext (i.e., System.Web.HttpContext.Current) to ensure the caller is properly authenticated. While this approach renders a simple API, it does mean that any code that calls LightSwitchApplication.Application.CreateContext() must have an ambient HttpContext that we can use to retrieve and validate the user identity. If you’re using WebAPI, MVC, or ASP.NET the ambient HttpContext is set for you; but keep this restriction in mind if you’re using an alternate technology or approach.
Threading and Troubleshooting
Code that uses the ServerApplicationContext must execute on the same thread on which the Http request is handled. Once the request is handled, the objects encapsulated in the ServerApplicationContext are disposed. If you’re experimenting with the ServerApplicationContext and seeing InvalidOperationExceptions, ObjectDisposedExceptions, and similar exceptions with irregular frequency, check to make sure that your code is running on the same thread that the Http request is handled. If you do need to start a new thread that will subsequently access the LightSwitch data, you’ll have to copy that data into a standalone collection or object graph before starting the thread.
Wrapping Up
Although the ServerApplicationContext is an unglamorous and seemingly simple API, it is our hope that it will address otherwise challenging scenarios that require specialized interaction between a client and the LightSwitch middle-tier. We’re eager to hear your feedback on it. Please feel free to post any questions or issues you encounter in the forums.


• The LightSwitch Team published HTML Client Screens for LightSwitch Apps to MSDN’s Visual Studio library on 11/19/2012. It begins:
By using Microsoft LightSwitch HTML Client Preview 2 for Visual Studio 2012, you can create HTML client screens that are optimized for display on mobile devices. This topic introduces the templates that you can use to create screens that are based on HTML5, the tools that you can use to design screens, and some of the tasks that you can perform to design the best screens for your LightSwitch application.
For an end-to-end example of a client that utilizes HTML screens, see Walkthrough: Creating a LightSwitch Client for Mobile Users.
You can add one or more HTML clients to an existing LightSwitch application, or you can create a Microsoft LightSwitch HTML Client Preview 2 for Visual Studio 2012 application that contains only an HTML client. Each HTML client is contained in its own project within the LightSwitch solution.
Note
When you add an HTML Client project to a LightSwitch solution, it’s upgraded to Microsoft LightSwitch HTML Client Preview 2 for Visual Studio 2012. The file structure of the solution is modified, and you can no longer open the solution on a computer that doesn’t have Microsoft LightSwitch HTML Client Preview 2 for Visual Studio 2012 installed.
For more information, see How to: Create or Add an HTML Client Project.
To get started, create a screen by using one of the following screen templates:
Browse Screen
View Details Screen
Add/Edit Details Screen
For information about how to choose a template, see Choosing a Screen Type for an HTML Client of a LightSwitch App.
For information about how to find these templates, see How to: Create an HTML Client Screen.
You can modify the design of a screen by using the screen designer. The screen designer displays items such as data fields and commands, and the screen content tree, which is a hierarchical representation of your data. You can drag items to the screen content tree and arrange them in the order you want.
For more information about the screen designer, see Tour of the Screen Designer.
For more information about how to perform specific tasks in the screen designer, see How to: Design an HTML Screen by Using the Screen Designer.
To modify the design of a screen, you can perform the following tasks:
- Modify the appearance of a screen
- Add fields and commands to a screen
- Filter the data that appears in a screen
- Add data to a screen
- Customize navigation between screens
- Modify a screen by using code
…

The article continues with detailed descriptions of each of the preceding tasks and concludes with these links:
Title
Description
Choosing a Screen Type for an HTML Client of a LightSwitch App
Describes templates that you can use as a starting point to create screens.
Shows how to add screens to your application.
Illustrates the parts of the designer and their functions.
Shows how to use the screen designer.
Shows how to add a custom local property field to a screen.
Shows how to add a button or a link that runs custom code in a screen.
How to: Add a Custom Control to an HTML Screen for a LightSwitch App
Shows how to use a custom HTML control in a LightSwitch screen.
Shows how to add data from other queries to a screen.
How to: Filter Data on an HTML Screen
Shows how to use queries to control which data appears in the screen.
Describes how to customize your application by writing code that runs when certain events happen.
How to: Modify an HTML Screen by Using Code
Describes how to use code to modify controls and interact with items on a screen.
Describes the properties of items that appear in the screen members list and the screen content tree of the screen designer. You can modify the appearance and behavior of items by using the Properties window to set the value of the properties.
How to: Control Navigation between HTML Screens in a LightSwitch App
Describes the screen navigation model for an HTML client of a LightSwitch application.
Paul van Bladel (@paulbladel) explained Using SignalR in LightSwitch to process toast notifications to connected clients in an 11/16/2012 post:
In my previous post [see below], I described a prototype for using signalR as a much simplified (and more powerful) replacement of the command table pattern.
In this post I will further elaborate on another nice feature of SignalR which are perfectly suitable for LightSwitch: the robust SignalR publish/subscribe mechanism for processing toast notifications to connected clients.
If you want to following things in code, it’s best to start with the code base of my previous post. We’ll work out an simple example: when a new customer is added to the database, we will send a toast notification to all connected silverlight clients:

How will we generate toast.
First problem to solve, how will we generate toasts? The answer is very simple. Go and grab Mr. Yossu’s excellent LightSwitch Extension: Pixata custom controls for Lightswitch
Note that toasts will only work in out-of-brower mode !
Server side handling
The amount of code necessary server side is really scary:
public partial class ApplicationDataService
    {
        partial void Customers_Inserted(Customer entity)
        {
            var myHub = GlobalHost.ConnectionManager.GetHubContext<MyHub>();

            var result = myHub.Clients.CustomersInserted(entity.LastName, this.Application.User.FullName);
        }
    }
So, the server is here really calling all Clients. More precisely, the server will call the “CustomerInserted method.
Client side handling
using System;
using System.Linq;
using System.IO;
using System.IO.IsolatedStorage;
using System.Collections.Generic;
using Microsoft.LightSwitch;
using Microsoft.LightSwitch.Framework.Client;
using Microsoft.LightSwitch.Presentation;
using Microsoft.LightSwitch.Presentation.Extensions;
using SignalR.Client.Hubs;
using PixataCustomControls.Presentation.Controls;
using Microsoft.LightSwitch.Security;
namespace LightSwitchApplication
{
    public partial class Application
    {
        public IHubProxy HubProxy { get; set; }
        partial void Application_Initialize()
        {
           HubConnection hubConnection;

          hubConnection = new HubConnection("http://localhost:8010"); //make sure it matches your port in development

            HubProxy = hubConnection.CreateProxy("MyHub");

            HubProxy.On<string, string>("CustomersInserted", (r, user) =>
            {
                this.Details.Dispatcher.BeginInvoke(() =>
                {
                    PixataToastHelper.ShowToast("New Customer inserted by " + user, "Customer Name : " + r);
                });
            });
            hubConnection.Start().Wait();
        }
    }
}
Conclusion
Setting up notifications is terribly simple with SignalR.
Consult the SignalR documentation for sending the notification to the sender only or to a group of users.


Paul van Bladel (@paulbladel) described Handling in LightSwitch commands in less than 10 lines of code in an 11/16/2012 post:
I elaborated some months ago and approach for sending command from client to server in LightSwitch because I thought we should start being serious about the command table pattern.
The approach was more or less ok, but quite incompatible with the idea of simplicity in LightSwitch. In other words, it was too cumbersome to set things up, etc. ..
I’m happy I can come up now with something new and based on both a very serious improvement in the LightSwitch base architecture and on a brilliant library called “SignalR”.
The improvent in LightSwitch is the recent introduction of the ServerApplicationContext class. This allows you to break into (but in a completely secure way) the LightSwitch application context from outside LightSwitch. For example from a web page or from a WCF dataservice. Jan Van der Haegen has a great post on how to do this. (executing-an-arbitrary-method-or-long-running-process-on-the-lightswitch-server)
The next building block is the SignalR library. This post is not a tutorial on SignalR. I will only focus on how to use it in LightSwitch. I kindly refer to the SignalR documentation for more details. In fact, most of the time, I’m quite reluctant to adopt a third-party library, but I’m quite happy to make an exception for SignalR, because it’s simply brilliant.
In my view, if you currently use the command table pattern. Consider throwing away all these classes, throw away your command table and start using following approach.
Many things to Jewel for bringing SignalR in my radar !
Setting up SignalR
We will need to include both client and server side a nuget package for SignalR.
In case you don’t know you to include a Nuget package:
- Put your solution in file view
- Right-click the client project and select “Manage Nuget Packages”
- Find SignalR.Client.Silverlight5
- Go now to the server project and do the same as for the client project, except select now as package: SignalR.Hosting.AspNet
That’s pretty simple. We have now all SignalR related assemblies in our client and server project.
Update: in case you have problems with the client side nuget package, you can download the dlls here as well: http://sdrv.ms/SDodpL .
Defining the command parameters
Commands will typically have parameters: the client needs to provide parameters to the server and the server will return certain parameters.
We add server side a class with following very simple command:
namespace LightSwitchApplication
{
    public class RequestParams
    {
        public string RequestParam1 { get; set; }
        public string RequestParam2 { get; set; }

    }
    public class ResponseParams
    {
        public string ResponseParam1 { get; set; }
        public string ResponseParam2 { get; set; }
    }
}
We will no longer use the common project because it’s gone in case you didn’t know.
As a result we will simply add the class client side via a file reference:
Right-click the client project and take “add existing item” and make sure you select “add as link”. By doing so, potential changes to the command structure are always propagated to the client project.

Great, now both client and server side have access to your command.
Setting up the command handling Server side
SignalR works in terms of Hubs. We have to setup such a Hub class. It will host the command, in my example called “MyCommand”.
We leverage here the new feature in the LightSwitch preview 2: the ServerApplicationContext. As you can see, we can inside our command access the full DataWorkspaces of our LightSwitch application. To proof this, we send back some information for the customer collection in the command response.
using System;
using System.Collections.Generic;
using System.Linq;
using System.Text;
using Microsoft.LightSwitch;
using Microsoft.LightSwitch.Security.Server;
using SignalR.Hubs;
using System.Diagnostics;
using System.Threading;
using SignalR;
using Microsoft.LightSwitch.Framework;
namespace LightSwitchApplication
{
    public class MyHub : Hub
    {
       public ResponseParams MyCommand(RequestParams requestParams)
        {
            using (ServerApplicationContext serverContext = Application.CreateContext())
            {
                var customers = serverContext.DataWorkspace.ApplicationData.Customers; // full access !!
                string input = requestParams.RequestParam1;
                Thread.Sleep(5000); // this emulates a typical long running process.
                return new ResponseParams
                {
                    ResponseParam1 = "just for letting you know",
                    ResponseParam2 = "We can access the data in your workspace: first customer: " + customers.First().LastName
                };
            }
        }
    }
}
Note that the above command is designed for demo purposes only, it’s not actually doing something useful, but it shows the plumbing.
You can see that my command needs access to the “customers” collection, so make sure you have Customer type in your dataworkspace and provide some sample customers (at least one).
Setting up the command client side
We first need to setup a HubProxy, which allows to comunicate with the server. We do this in the Application_Initialize event. By doing so, all screens will have access to the HubProxy:
using System;
using System.Linq;
using System.IO;
using System.IO.IsolatedStorage;
using System.Collections.Generic;
using Microsoft.LightSwitch;
using Microsoft.LightSwitch.Framework.Client;
using Microsoft.LightSwitch.Presentation;
using Microsoft.LightSwitch.Presentation.Extensions;
using SignalR.Client.Hubs;
using Microsoft.LightSwitch.Security;
namespace LightSwitchApplication
{
    public partial class Application
    {
        public IHubProxy HubProxy { get; set; }
        partial void Application_Initialize()
        {
            HubConnection hubConnection;
            hubConnection = new HubConnection("http://localhost:8010"); //make sure it matches your port in dev
            HubProxy = hubConnection.CreateProxy("MyHub");
            hubConnection.Start().Wait();
        }
    }
}
Next we will call our command behind a simple lightSwitch button. I do this on a CustomerListDetail screen:
using System;
using System.Linq;
using System.IO;
using System.IO.IsolatedStorage;
using System.Collections.Generic;
using Microsoft.LightSwitch;
using Microsoft.LightSwitch.Framework.Client;
using Microsoft.LightSwitch.Presentation;
using Microsoft.LightSwitch.Presentation.Extensions;
using SignalR.Client.Hubs;
namespace LightSwitchApplication
{
   public partial class CustomersListDetail
    {
        partial void MyFirstCommand_Execute()
        {
            Application.HubProxy.Invoke<ResponseParams>("MyCommand",
                new RequestParams { RequestParam1 = "request 1", RequestParam2 = "request 2" }).ContinueWith((task) =>
                    {
                        var responseparam2 = task.Result.ResponseParam2;
                        this.Details.Dispatcher.BeginInvoke(() =>
                        {
                            this.ShowMessageBox("Thanks for " + responseparam2);
                        });

                    });
            this.ShowMessageBox("The show must go on, why should we wait before the task completes?");
        }
    }
}
What’s next?
SignalR is really huge. Note that without the new ServerApplicationContext it would be impossible to access the application context (and thus the data). Well,… it would be possible via a service reference to the application service endpoint, but making service references between artefacts server side is not so elegant. Furthermore there is no service reference between client and server.
I have also the impression that microsoft treats SignalR as a “first class citizen”… and that’s not without reason.
Furthermore, SignalR is not only usable for sending commands between client and server (and getting back the response), it has also an extremely powerfull publish/subscribe mechanism. In other words we could use it to broadcast message to all or a subset of clients connected to the server. That will probably my next post.


Return to section navigation list>
Windows Azure Infrastructure and DevOps
•• Avkash Chauhan (@avkashchauhan) answered How does Windows Azure PowerShell import publishsettings using Import-AzurePublishSettingsFile command? in an 11/20/2012 post:
As you already know you can use Windows Azure Powershell to manage your Windows Azure Service. To get it started, you need to setup your development machine to be ready to use Windows Azure PowerShell commands and this is done by downloading the publishsetting file from Windows Azure Management Portal about your account first.
To download the Windows Azure PowerShell you can use the following command in PowerShell
PS C:\> Get-AzurePublishSettingsFile
The above command launches the following URL which allows you to download the .publishsettings on your local machine.
https://windows.azure.com/download/publishprofile.aspx?wa=wsignin1.0
Based on number of subscription(s) associated with your Live ID you will see that many certificate added in your management certificate sections as shows below:

Once you save the .publishsettings file locally you can use it with PowerShell as below:
PS C:\> Import-AzurePublishSettingsFile WindowsAzureInternal-11-20-2012-credentials.publishsettings
Setting: Windows Azure Internal Consumption - ******* as the default and current subscription. To view other subscriptions use Get-AzureSubscription
When above command runs it creates configuration specific setting the local machine located as below:
C:\Users\<Windows_Login_User_Name>\AppData\Roaming\Windows Azure Powershell
- config.json
- DefaultSubscriptionData.xml
- publishSettings.xml
If you open publishsettings.xml you will see the Certificate Thumb print as below:
 <?xml version="1.0"?>
 <PublishData xmlns:xsi="http://www.w3.org/2001/XMLSchema-instance" xmlns:xsd="http://www.w3.org/2001/XMLSchema">
 <PublishProfile PublishMethod="AzureServiceManagementAPI" Url="https://management.core.windows.net/" ManagementCertificate="********************************************">
 <Subscription Id="GUID_1" Name="Windows Azure Internal Consumption *" />
 <Subscription Id="GUID_2" Name="Windows Azure Internal Consumption ****" />
 </PublishProfile>
 </PublishData>
In some case you may get an error as below while importing PublishSettings using Import-AzurePublishSettingsFile:
 Import-AzurePublishSettingsFile : Value can not be null.
 Parameter name: s
 At line:1 char:1
If that is the case, try the following solution:
- Go ahead and delete all the files in above location (C:\Users\<Windows_Login_User_Name>\AppData\Roaming\Windows Azure Powershell)
- Try again using the same command. This will re-generate the configuration files again the publish settings will be imported.


• Scott Guthrie (@scottgu) described More Great Improvements to the Windows Azure Management Portal in an 11/19/2012 post:
Over the last 3 weeks we’ve released a number of enhancements to the new Windows Azure Management Portal. These new capabilities include:
- Localization Support for 6 languages
- Operation Log Support
- Support for SQL Database Metrics
- Virtual Machine Enhancements (quick create Windows + Linux VMs)
- Web Site Enhancements (support for creating sites in all regions, private github repo deployment)
- Cloud Service Improvements (deploy from storage account, configuration support of dedicated cache)
- Media Service Enhancements (upload, encode, publish, stream all from within the portal)
- Virtual Networking Usability Enhancements
- Custom CNAME support with Storage Accounts
All of these improvements are now live in production and available to start using immediately. Below are more details on them:
Localization Support
The Windows Azure Portal now supports 6 languages – English, German, Spanish, French, Italian and Japanese. You can easily switch between languages by clicking on the Avatar bar on the top right corner of the Portal:

Selecting a different language will automatically refresh the UI within the portal in the selected language:

Operation Log Support
The Windows Azure Portal now supports the ability for administrators to review the “operation logs” of the services they manage – making it easy to see exactly what management operations were performed on them. You can query for these by selecting the “Settings” tab within the Portal and then choosing the “Operation Logs” tab within it. This displays a filter UI that enables you to query for operations by date and time:

As of the most recent release we now show logs for all operations performed on Cloud Services and Storage Accounts. You can click on any operation in the list and click the “Details” button in the command bar to retrieve detailed status about it. This now makes it possible to retrieve details about every management operation performed.
In future updates you’ll see us extend the operation log capability to apply to all Windows Azure Services – which will enable great post-mortem and audit support.
Support for SQL Database Metrics
You can now monitor the number of successful connections, failed connections and deadlocks in your SQL databases using the new “Dashboard” view provided on each SQL Database resource:

Additionally, if the database is added as a “linked resource” to a Web Site or Cloud Service, monitoring metrics for the linked SQL database are shown along with the Web Site or Cloud Service metrics in the dashboard. This helps with viewing and managing aggregated information across both resources in your application.
Enhancements to Virtual Machines
The most recent Windows Azure Portal release brings with it some nice usability improvements to Virtual Machines:
Integrated Quick Create experience for Windows and Linux VMs
Creating a new Windows or Linux VM is now easy using the new “Quick Create” experience in the Portal:

In addition to Windows VM templates you can also now select Linux image templates in the quick create UI:

This makes it incredibly easy to create a new Virtual Machine in only a few seconds.
Enhancements to Web Sites
Prior to this past month’s release, users were forced to choose a single geographical region when creating their first site. After that, subsequent sites could only be created in that same region. This restriction has now been removed, and you can now create sites in any region at any time and have up to 10 free sites in each supported region:

One of the new regions we’ve recently opened up is the “East Asia” region. This allows you to now deploy sites to North America, Europe and Asia simultaneously.
Private GitHub Repository Support
This past week we also enabled Git based continuous deployment support for Web Sites from private GitHub and BitBucket repositories (previous to this you could only enable this with public repositories).
Enhancements to Cloud Services Experience
The most recent Windows Azure Portal release brings with it some nice usability improvements to Cloud Services:
Deploy a Cloud Service from a Windows Azure Storage Account
The Windows Azure Portal now supports deploying an application package and configuration file stored in a blob container in Windows Azure Storage. The ability to upload an application package from storage is available when you custom create, or upload to, or update a cloud service deployment. To upload an application package and configuration, create a Cloud Service, then select the file upload dialog, and choose to upload from a Windows Azure Storage Account:

To upload an application package from storage, click the “FROM STORAGE” button and select the application package and configuration file to use from the new blob storage explorer in the portal.
Configure Windows Azure Caching in a caching enabled cloud service
If you have deployed the new dedicated cache within a cloud service role, you can also now configure the cache settings in the portal by navigating to the configuration tab of for your Cloud Service deployment. The configuration experience is similar to the one in Visual Studio when you create a cloud service and add a caching role. The portal now allows you to add or remove named caches and change the settings for the named caches – all from within the Portal and without needing to redeploy your application.
Enhancements to Media Services
You can now upload, encode, publish, and play your video content directly from within the Windows Azure Portal. This makes it incredibly easy to get started with Windows Azure Media Services and perform common tasks without having to write any code.
Simply navigate to your media service and then click on the “Content” tab. All of the media content within your media service account will be listed here:

Clicking the “upload” button within the portal now allows you to upload a media file directly from your computer:

This will cause the video file you chose from your local file-system to be uploaded into Windows Azure. Once uploaded, you can select the file within the content tab of the Portal and click the “Encode” button to transcode it into different streaming formats:

The portal includes a number of pre-set encoding formats that you can easily convert media content into:

Once you select an encoding and click the ok button, Windows Azure Media Services will kick off an encoding job that will happen in the cloud (no need for you to stand-up or configure a custom encoding server). When it’s finished, you can select the video in the “Content” tab and then click PUBLISH in the command bar to setup an origin streaming end-point to it:

Once the media file is published you can point apps against the public URL and play the content using Windows Azure Media Services – no need to setup or run your own streaming server. You can also now select the file and click the “Play” button in the command bar to play it using the streaming endpoint directly within the Portal:

This makes it incredibly easy to try out and use Windows Azure Media Services and test out an end-to-end workflow without having to write any code. Once you test things out you can of course automate it using script or code – providing you with an incredibly powerful Cloud Media platform that you can use.
Enhancements to Virtual Network Experience
Over the last few months, we have received feedback on the complexity of the Virtual Network creation experience. With these most recent Portal updates, we have added a Quick Create experience that makes the creation experience very simple. All that an administrator now needs to do is to provide a VNET name, choose an address space and the size of the VNET address space. They no longer need to understand the intricacies of the CIDR format or walk through a 4-page wizard or create a VNET / subnet. This makes creating virtual networks really simple:

The portal also now has a “Register DNS Server” task that makes it easy to register DNS servers and associate them with a virtual network.
Enhancements to Storage Experience
The portal now lets you register custom domain names for your Windows Azure Storage Accounts. To enable this, select a storage resource and then go to the CONFIGURE tab for a storage account, and then click MANAGE DOMAIN on the command bar:

Clicking “Manage Domain” will bring up a dialog that allows you to register any CNAME you want:

Summary
The above features are all now live in production and available to use immediately. If you don’t already have a Windows Azure account, you can sign-up for a free trial and start using them today. Visit the Windows Azure Developer Center to learn more about how to build apps with it.
One of the other cool features that is now live within the portal is our new Windows Azure Store – which makes it incredibly easy to try and purchase developer services from a variety of partners. It is an incredibly awesome new capability – and something I’ll be doing a dedicated post about shortly.


Haishi Bai (@HaishiBai2010) posted a Walkthrough: Using New Relic to monitor your Windows Azure Cloud Services on 11/19/2012:
With the release of Windows Azure Store, more and more powerful SaaS solutions can be easily incorporated into Windows Azure’s ecosystem, providing tremendous opportunities for service providers to utilize these new capabilities in their services and applications. In BUILD 2012 Azure keynote we demonstrated how you can use New Relic to instrument and monitor your Cloud Services. In this post I’ll walk you through the configuration steps behind the science that made the demo possible.
Setting up the Cloud Service
In this part we’ll create a brand-new Cloud Service that contains some pages and a couple of Web API methods. Of course you can start with you own service, but if you are trying this for the first time, using a dummy service is probably a better idea.
- Create a new Cloud Service with a ASP.Net MVC 4 Web Role (using Internet Application template).
- Add a new Web API controller to the Web Role using API controller with empty read/write actions.
Provisioning New Relic service
In this part we’ll provision a new New Relic account using Windows Azure Management Portal.
- Log on to Windows Azure Management Portal.
- Use NEW->Store to launch Windows Azure Store wizard.
- Select New Relic, then click right arrow to continue

- Select a package you want to use (you can start with the free package). Pick a name for your subscription, and then click right arrow to continue

- After reviewing summary, click Purchase to complete the wizard

- After the service is provisioned, you can get your API KEY and APPLICATION KEY by click on CONNECTION INFO icon.
Configuring New Relic Agent
To allow New Relic to collect performance metrics, you’ll need to deploy a New Relic agent along with your service. Fortunately this is very easy using New Relic NuGet package.
- Add NewRelicWindowsAzure (New Relic x64 for Windows Azure) NuGet package to the Web Role.
- The install wizard will ask for your license key. Paste in the license key you get in step 6 of above section

- Then the wizard will ask you for an application name. This name will be used in your New Relic portal to visually identify your application.
After the wizard completes you can see a newrelic.cmd file, which is registered as a startup task that installs NewRelicAgent_x64_{version}.msi to your host machine.
Give it a try!
That’s all you need to do to get started! Now publish your Cloud Service to Windows Azure, click around to generate some requests, and wait for a couple of minutes for your application to show up in New Relic portal. To access the New Relic portal from Windows Azure Management Portal, click on MANAGE icon of your New Relic subscription:

Adding Browser Tracing
New Relic agent reports server-side metrics such as app server response time and throughputs etc. To measure client-side metrics such as client perceived response time, you’ll need to enable browser tracing, which will inject some JavaScript snippets to your web page to report performance data back to New Relic. You can use New Relic API methods, NewRelic.Api.Agent.NewRelic.GetBrowserTimingHeader() and NewRelic.Api.Agent.NewRelic.GetBrowserTimingFooter() to generate these snippets. For example, in my ASP.NET MVC 4 _layout.cshtml page, I added the following calls:
<!DOCTYPE html>
<html lang="en">
    @Html.Raw(NewRelic.Api.Agent.NewRelic.GetBrowserTimingHeader())
    ...
    @Html.Raw(NewRelic.Api.Agent.NewRelic.GetBrowserTimingFooter())
</html>
Because the layout page is shared among all pages, I can trace into all page requests in this way.
Trace Web API
The above method for browser tracing only works for web pages that use _layout.cshtml page. What about API controllers, or WCF services that don’t have a frontend? You can define custom instrumentations easily with New Relic as well. The following is an example to trace Get() method of my API controller:
- Add a new file, named CustomInstrumentation.xml, to the root folder of your Web Role project. In the following file, I’m instructing New Relic instrumentation to trace Get method of my APIController defined in my web project
<?xml version="1.0" encoding="utf-8" ?> <extension xmlns="urn:newrelic-extension"> <instrumentation> <tracerFactory> <match assemblyName="NewRelicSample.Web" className="NewRelicSample.Web.Controllers.APIController"> <exactMethodMatcher methodName="Get" /> </match> </tracerFactory> </instrumentation> </extension>- Uncomment the following line from newrelic.cmd, and redeploy your service
copy /y CustomInstrumentation.xml %NR_HOME%\extensions >> d:\nr.logYou can also directly call into New Relic API from any classes, such as a WCF service implementation, to trance performance data, as shown in the following example:
public async Task<HttpResponseMessage> Post()
{
    NewRelic.Api.Agent.NewRelic.SetTransactionName("API", "Video Creation");

    Stopwatch watch = Stopwatch.StartNew();
     … doing stuff …
     watch.Stop();

    NewRelic.Api.Agent.NewRelic.RecordResponseTimeMetric("Video Creation", watch.ElapsedMilliseconds);
     return Request.CreateResponse(HttpStatusCode.Created, video);
}
Screenshots
Here are some screenshots highlighting just a few interesting features of New Relic.
Map view gives you a visual presentation of external service dependencies. In the following sample you can see my service depends on Twitter, Windows Azure Table Storage, as well as Windows Azure ACS. You can drill into each service to get more details as well.

Geographic view gives you an intuitive representation of client perceived response times across the states or around the globe.

Detailed transaction view allows you to drill down all the way to call stacks and even SQL statements so you can easily identify bottlenecks across different application layers.

Have a large system? Trace your Key Transactions in a separate view to keep a close eye on key components of your system.

Summary
In this walkthrough we went through all the steps necessary to utilize New Relic to monitor your Cloud Service performance from both server side and client side. Ready to get started? Follow this link to receive your free Windows Azure trail subscription with free New Relic service offering!


Kristian Nese (@KristianNese) described how to workaround Windows network virtualization is not enabled on a host NIC available for placement problems in an 11/19/2012 post:
“Windows network virtualization is not enabled on a host NIC available for placement”
- You have created a logical network in the Fabric workspace in VMM.
- Then, you have created a VM Network, and tries to deploy a VM or/and a Service to your cloud or host group, associated with this network.
You’ll get the error mentioned above, during the intelligent placement step in the wizard.
Resolution:
Log on to your hosts/clusters where you can’t perform the deployment and enable the “Windows Network Virtualization Filter Driver” option on the NIC used for the virtual switch.
Refresh the hosts/clusters in VMM and retry the operation.

<Return to section navigation list>
Windows Azure Platform Appliance (WAPA), Hyper-V and Private/Hybrid Clouds
![]() No significant articles today
No significant articles today
<Return to section navigation list>
Cloud Security and Governance
 No significant articles today
<Return to section navigation list>
Cloud Computing Events
•• My (@rogerjenn) Links to Channel 9’s Video Archives of the Online Windows Azure Conf of 11/14/2012 post of 11/21/2012 begins:
From Channel 9’s Windows Azure Conf 2012 article of 11/14/2012 with minor edits for tense adjustment:
This online event featured a keynote presentation by Scott Guthrie, along with numerous sessions executed by Windows Azure community members. After the keynote, two concurrent sets of sessions were streamed live for an online audience right here on Channel 9.
The videos of these sessions allow you to see how developers just like you are using Windows Azure to develop applications in the cloud. Community members from all over the world joined Scott in the Channel 9 studios to present their own ideas, innovations inventions and experiences.
These archives will provide you the opportunity to see how your peers in the community are doing great things using Windows Azure offerings like Mobile Services, Web Sites, Service Bus, Virtual Machines, and more. …


and continues with links to Scott’s keynote and 11 session video segments.
Michael Collier (@MichaelCollier) posted Windows AzureConf – A Recap on 11/21/2012
Last week I had the honor to present at the very first Windows AzureConf. AzureConf was a 1-day live, online conference dedicated to sharing real-world experiences with Windows Azure.
If you missed my presentation, “Elevating Windows Azure Deployments“, you can watch it online or download it from the Windows AzureConf event page on Channel 9.

My whole experience related to Windows AzureConf was amazing! The day before AzureConf I traveled to Redmond to get in some rehearsal time in Microsoft’s Channel 9 studios. I’m fairly comfortable now giving presentations in front of a group, but giving a presentation in a studio is something different all together. The studio is much smaller than I anticipated. If you’ve ever been to a taping of a TV show, you know the studio is much smaller than it appears on TV. Same thing with the Channel 9 studio. Being in an enclosed room with bright TV lights, a few cameras, and no audience is kind of strange. Having some time in the studios before the LIVE show was very helpful – just to get comfortable with the surroundings and general logistics.
It’s Showtime!
Wednesday, November 14th was game day – time for AzureConf! All the speakers arrived at the Channel 9 studios early that day. We had a group picture with Scott Guthrie before his opening keynote, and then it was showtime.

Scott kicked off the event with a great overview of Windows Azure. After Scott’s keynote, it was time for presentations from Windows Azure MVPs and Insiders. There are two studios at Channel 9 – studio A and studio B. Studio A is the larger studio you see on shows like Cloud Cover and Web Camps TV. Studio B is a smaller studio were the presenter sits at a desk – kind of like the nightly news. Presentations were being streamed LIVE from both studios.
A lot goes on behind the scenes to make an event like Windows AzureConf a success. It was really interesting to see how the production staff at Channel 9 works – amazing staff! Brady Gaster was the main “cat herder” for Windows AzureConf. He was simply awesome! There’s no doubt a ton of moving pieces to get in place for such an event, and it all seemed to come off flawlessly. Thank you! Special thanks also to Cory Fowler and Chris Risner for providing additional support during the day and helping to moderate the questions asked online or via Twitter.
The Presenters
I really enjoyed getting to spend some time with all the other presenters. The passion for doing great, exciting work with Windows Azure is amazing! These guys came from all over the world! My trip to the Redmond area was relatively easy – about 7 hours total. Some of the speakers spent a good part of a day, if not more, traveling to Redmond. Great guys with an amazing passion for Windows Azure and the community!
- Andy Cross
- Eric Boyd
- Magnus Martensson
- Mihai Tataran
- Panagiotis Kefalidis
- Rick Garibay
- Sasha Goldshtein
- Johnny Halife
If you missed a session, you can watch all the sessions from the event page at http://channel9.msdn.com/Events/WindowsAzureConf/2012. I know I’ll be downloading several sessions that I missed (either busy preparing for my session or was watching another).


Michael Washam (@MWashamMS) posted Windows Azure Best of Build 2012 Video on 11/19/2012:
Check out this video and post on some of the best moments of Windows Azure @Build 2012:
<Return to section navigation list>
Other Cloud Computing Platforms and Services
•• Jeff Barr (@jeffbarr) reported SQS Queues and SNS Notifications - Now Best Friends in an 11/21/2012 post:
The Amazon Simple Queue Service (SQS) and the Amazon Simple Notification Service (SNS) are important "glue" components for scalable, cloud-based applications (see the Reference Architectures in the AWS Architecture Center to learn more about how to put them to use in your own applications).
One common design pattern is called "fanout." In this pattern, a message published to an SNS topic is distributed to a number of SQS queues in parallel. By using this pattern, you can build applications that take advantage parallel, asynchronous processing. For example, you could publish a message to a topic every time a new image is uploaded. Independent processes, each reading from a separate SQS queue, could generate thumbnails, perform image recognition, and store metadata about the image:
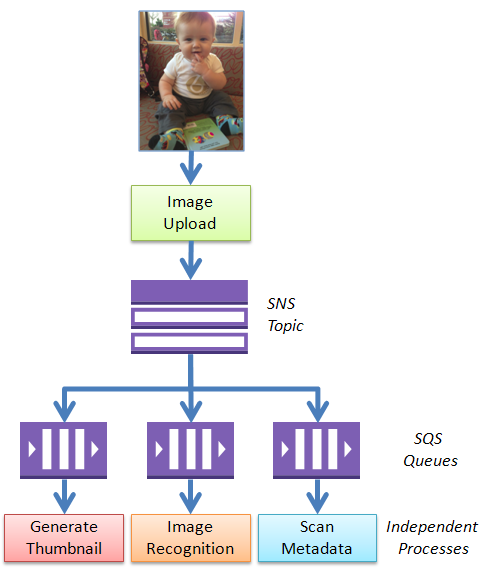
Today we are making it easier for you to implement the fanout pattern using a combination of SNS and SQS by giving you the ability to subscribe SQS queues to SNS topics via the AWS Management Console! There's a new menu item in the SQS page of the console:

Then you choose the desired topic:
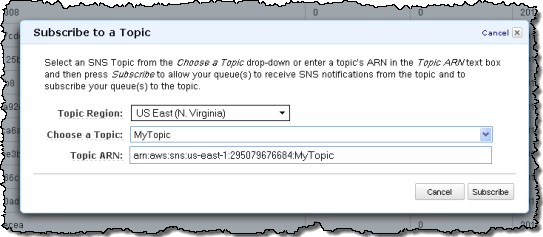
That's all it takes!


•• Jeff Barr (@jeffbarr) described EBS Volume Status Checks in an 11/21/2012 post:
We've received some great feedback on the EC2 instance status checks that were released earlier this year. Our customers appreciate the fact that we can detect and report on how their EC2 instances are performing.
Today we are taking are adding a new status check for EBS Provisioned IOPS volumes. As you know, you can now provision up to 2000 IOPS when you create a new EBS volume:
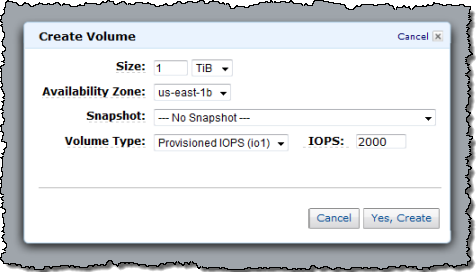
We are now making a new I/O Performance status check available for each Provisioned IOPS volume. The status check will tell you how well your volume is doing with respect to the number of IOPS that have been provisioned. In the background, we measure the volume's I/O performance each minute and determine if it is Normal, Degraded, Severely Degraded or Stalled.
A volume's performance may fall below normal if you are accessing data on it for the first time, making frequent snapshots at peak usage times, or accessing the volume from an EC2 instance that isn't EBS-optimized.
You can view the status of your Provisioned IOPS volumes in the AWS Management Console:
You can also retrieve the status by calling the DescribeVolumeStatus function. To learn more about this feature, visit the Monitoring the Status of Your Volumes section of the EC2 documentation.
We are also publishing two new CloudWatch metrics for each volume at one minute intervals:
VolumeThroughputPercentage is the percentage of IOPS delivered out of the IOPS provisioned for an EBS volume.
VolumeConsumedReadWriteOps is the total amount of read and write operations consumed in the period. Provisioned IOPS volumes process your applications’ reads and writes in I/O block sizes of 16KB or less. Every increase in I/O size above 16KB will linearly increase the resources you need to achieve the same IOPS rate.

You can view these metrics in the AWS Management Console and you can access them through the CloudWatch APIs.


There is no grass growing under the feet of AWS’ developers.
• Tom Rizzo (@TheRealTomRizzo, pictured below) wrote Windows Server 2012 Now Available on AWS and Jeff Barr (@jeffbarr) published it on 11/19/2012:
Today we have an awesome guest post from a General Manager on the Amazon EC2 team. Enjoy!
-- Jeff;
Before talking about Windows Server 2012, let me first introduce myself. My name is Tom Rizzo and I’m the General Manager for the Windows team in AWS. I previously worked at Microsoft in a variety of business groups including Exchange Server, SQL Server and SharePoint Server. I’m excited to be at Amazon helping AWS be the best place for customers to run Windows and Windows workloads.
We’re trying something new on the AWS blog by introducing a series we call “Windows Wednesdays” to help you learn more about the work we’re doing to support Windows on AWS. While we’ll try to post at least twice a month about some new feature, tidbit or something you may not know about Windows on AWS, I won’t promise that we won’t miss a Wednesday or two… but we’ll do our best!
With that said, we couldn't wait for Wednesday for this announcement! AWS is excited to add Windows Server 2012 as an option for customers in addition to our existing Windows Server 2003 R2, 2008 and 2008 R2 offerings. Windows Server 2012 provides a number of exciting enhancements including a Server Manager for multi-server setup, Powershell Improvements, Internet Information Services 8.0 and the .NET Framework 4.5.
What's New in AWS for Windows Server?
Beyond what’s new from Microsoft in terms of Windows Server 2012 functionality, here are some highlights specific to Windows Server 2012 on AWS.Free Tier
First, you can use Windows Server, including Windows Server 2012, as part of the AWS Free Usage Tier. By using it, you get 750 hours of a Micro Instance per month for a full year! It’s a great way to start evaluating Windows Server 2012 and when you’re ready to use it in production, just stop your instance and restart it on a bigger instance. No migration and no messy moving around on different server hardware. AWS makes it easy for you to grow the power of your instances with a few clicks of the mouse.New Languages
With the global expansion of AWS, we want to make sure we meet the needs of our worldwide customers. To that end, today we’re publishing 31 Windows Server 2012 AMIs which includes AMIs for 19 different languages and for Windows with SQL Server 2008 and 2008 R2 (Express, Web and Standard). The AMIs are available in every Region and can be used with any instance type.AWS Elastic Beanstalk Support for Windows Server 2012
AWS Elastic Beanstalk allows you to focus on building your application, without having to worry about the provisioning and maintenance aspects of your applications. Elastic Beanstalk already supports Java, PHP, Python, Ruby, and Windows Server 2008 R2 based .NET applications. Starting today, it will also support Windows Server 2012 based .NET applications. You can conveniently deploy your applications from Visual Studio or the AWS Management Console..NET 4.5 and Visual Studio 2012 Support
To support building applications on Windows with .NET, AWS supports the new .NET framework shipped with Windows Server 2012 - .NET 4.5. With integrated Visual Studio support, including the new Visual Studio 2012, getting started with building AWS applications is as easy as creating an AWS project in Visual Studio as shown below..
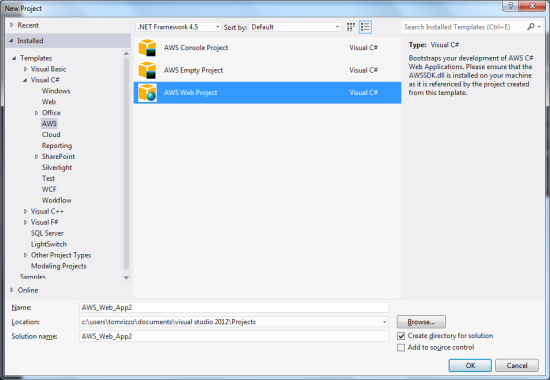
Included with the Visual Studio tools is the AWS Explorer which allows you to see all of your AWS resources without leaving the Visual Studio environment. In addition, you can deploy to AWS with just a few clicks and can decide whether you want to deploy to EC2 instances or use Elastic Beanstalk as the target for your applications.
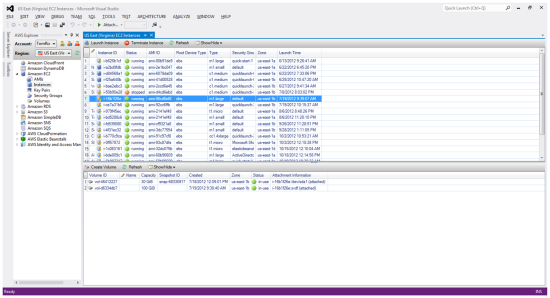
Getting Started
To help you get started with Windows Server 2012, we put together a quick introduction video that steps you through the process of creating a Windows Server 2012 instance, expanding the size of the root volume, adding an EBS volume, and connecting to the instance.If you are attending AWS re:Invent next week, please feel free to drop by the EC2 booth to learn more. We'll also be presenting several sessions on Windows.


I’ve known Tom at Microsoft since the early days of Visual Basic and was surprised to find that he had taken the EC2 General Manager’s job at AWS. He was the technical editor of my Expert-One-on-One Visual Basic 2005 Database Programming book for Wiley/Wrox. I wish him best of luck in his new gig, but not too much luck.
<Return to section navigation list>


0 comments:
Post a Comment